
The Plumeria Pests and Diseases Guide is an essential resource for identifying, preventing, and treating the most common threats to plumeria plants, including pests, fungi, and environmental stressors. This guide offers detailed information on how to recognize early signs of trouble, from insect infestations to fungal infections, and provides practical solutions to address these issues. It also covers strategies for managing environmental factors such as excessive humidity, temperature fluctuations, and poor soil conditions, which can weaken plumeria. With expert tips on natural and chemical treatments, as well as proactive care practices, this guide ensures your plumeria remains healthy, resilient, and free from common ailments, allowing it to thrive season after season.
Plumeria Pest Control for Beginners: Detailed Treatment Guide
What to check next
This guide helps you confirm that a living pest is present, identify where it is feeding, and choose a measured response without treating inactive damage. Read the detailed explanation, then use this sequence to decide what to do.
Confirm the evidence for a possible insect or pest
- Look for
- Active pests, eggs, cast skins, webbing, honeydew, frass, slime, tunnels, holes, or fresh feeding in the location expected for the pest.
- Compare with
- Disease, water, roots, nutrition, sun, wind, chemicals, and old physical damage can resemble pest injury.
- Safest first response
- Inspect with bright light and magnification, isolate when appropriate, remove manageable pests, and use a labeled control only for a confirmed target.
Microclimate clue: Heat, humidity, rain, dust, protected storage, dense foliage, and nearby host plants can change which pests are likely and how quickly they multiply.
- 1
Inspect before treating
Use bright light and magnification on leaf undersides, tips, petioles, stems, and the soil line.
- 2
Find active evidence
Look for moving pests, eggs, skins, webbing, honeydew, frass, slime trails, holes, or fresh feeding.
- 3
Identify the feeding pattern
Separate sucking, chewing, mining, boring, and root-zone damage.
- 4
Start with the least disruptive action
Isolate, wash, and use only a treatment labeled for the confirmed pest and plant.
- 5
Repeat the inspection
Eggs or protected life stages can survive the first response, so follow-up checks matter.
How microclimate changes this answer
Dry heat favors mites, protected humid growth favors some scale and mealybugs, and wet shade increases snail and slug activity.
This beginner guide explains how to handle plumeria pest problems without guessing or over-treating. The goal is to identify the pest, understand whether the damage is active, choose the least-disruptive effective control, and follow up until new growth is clean.
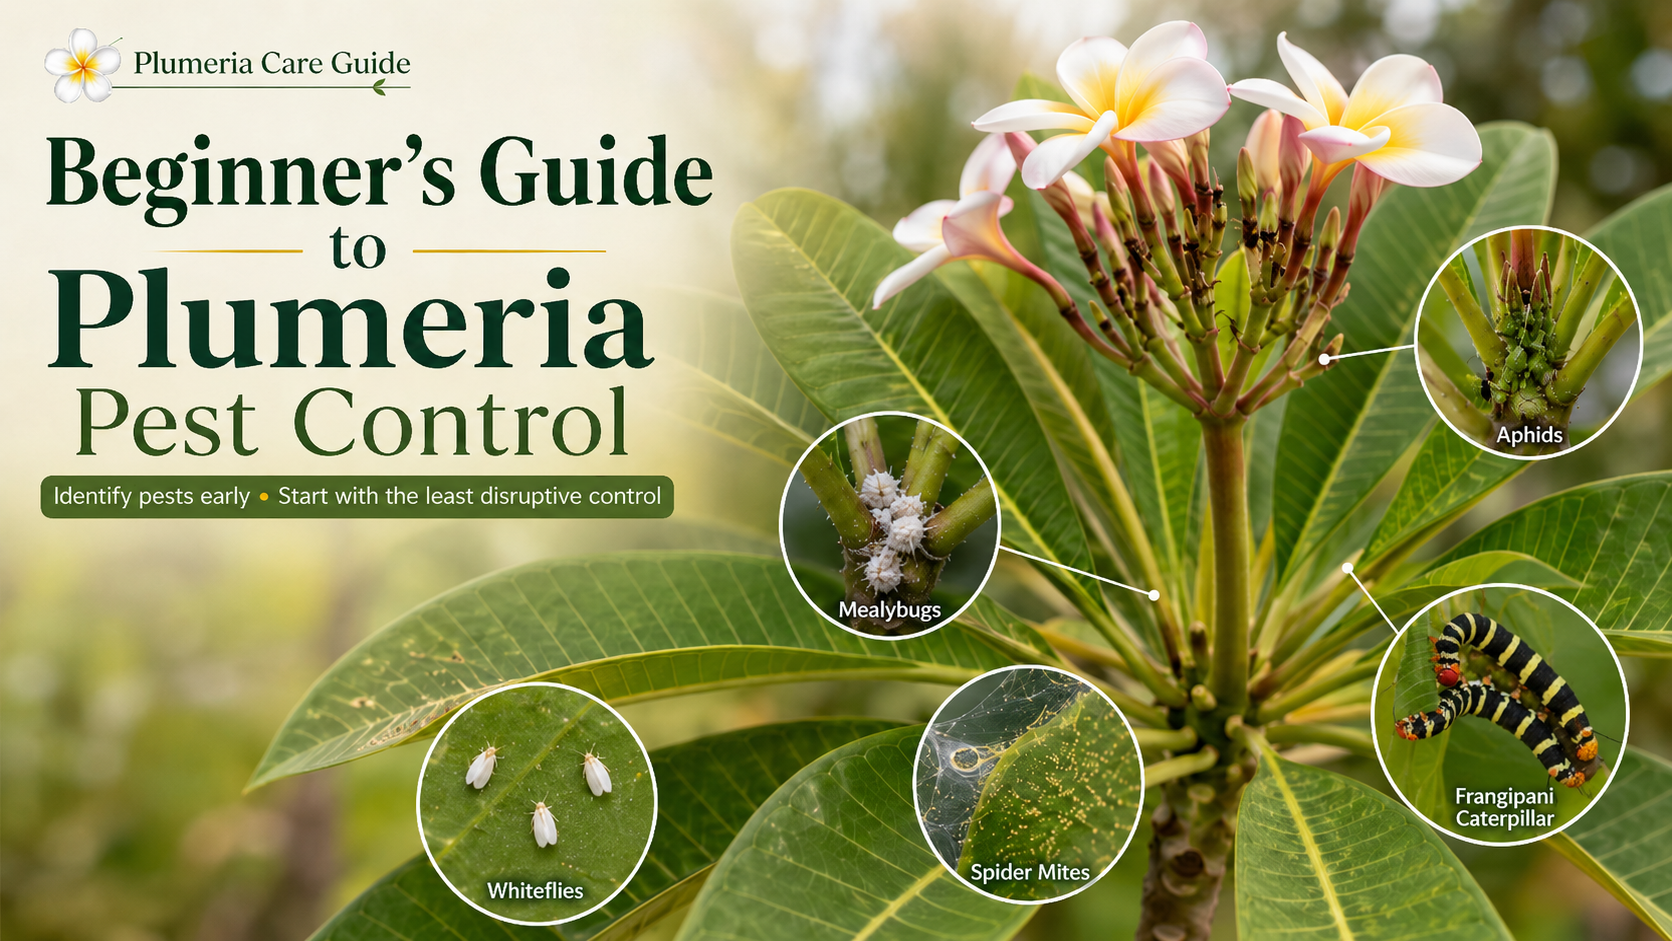
Treatment Safety and IPM Path
Use this path before choosing a spray, oil, soap, drench, systemic, biological control, or homemade treatment. The safest effective treatment depends on the pest, the plant’s stress level, the weather, beneficial insects, and whether the damage is active or old.
- Inspect first so stress, old damage, disease, and look-alikes are not treated as active pests.
- Decide whether to monitor, isolate, rinse, prune, or treat before reaching for a product.
- Use IPM: identify the pest, reduce plant stress, protect beneficials, and choose the least-disruptive option that fits the problem.
- Run the treatment safety checklist before applying any product, including organic products.
- Read and follow the product label for site, pest, rate, timing, personal protection, storage, and disposal.
Why: unnecessary or poorly timed treatments can burn plumeria leaves, miss the real pest, harm beneficial insects, increase resistance pressure, or create safety problems.
Use This Guide After the First Inspection
This is the second-step guide. Begin here after you have photographs and a reasonable pest match, or after completing the five-minute Quick Start.
- Bring the pest evidence: organism, eggs, webbing, honeydew, frass, slime, holes, or fresh feeding.
- Bring the plant stage: unrooted cutting, newly rooted cutting, seedling, graft, established potted plant, or in-ground plant.
- Bring the growing conditions: moisture, drainage, recent weather, light, airflow, and saved Growing Area when available.
- Bring the treatment history: product, rate, date, application method, and result.
The sections below compare physical, biological, organic or lower-impact, and conventional options. Start with the least disruptive method likely to control the confirmed target, then set a recheck date before escalating.
Quick Start
- Inspect the whole plant, including undersides of leaves, stems, tips, soil line, pot rim, and nearby plants.
- Identify the pest before choosing treatment.
- Decide whether the problem needs monitoring, rinsing, pruning, isolation, or treatment.
- Correct stress: water, roots, airflow, dust, heat, and crowding.
- Use products only when the pest, plant, label, and weather all fit.
- Recheck new growth and active pests after treatment.

Common Pest Clues
| Clue | Possible pest | Best first step |
|---|---|---|
| Sticky leaves, ants, or sooty mold | Aphids, mealybugs, scale, or whiteflies. | Check undersides and stems for sap-sucking insects. |
| Dusty, stippled, bronzed leaves | Spider mites. | Check leaf undersides and rinse the canopy when appropriate. |
| Distorted tender growth | Thrips, leafhoppers, mites, or stress. | Inspect new growth closely before spraying. |
| Chewed leaves or missing tissue | Caterpillars, beetles, grasshoppers, snails, or slugs. | Look at night, under leaves, and around pots. |
| Weak plant with root decline | Root pests, root rot, or watering stress. | Check roots and media before using drenches. |
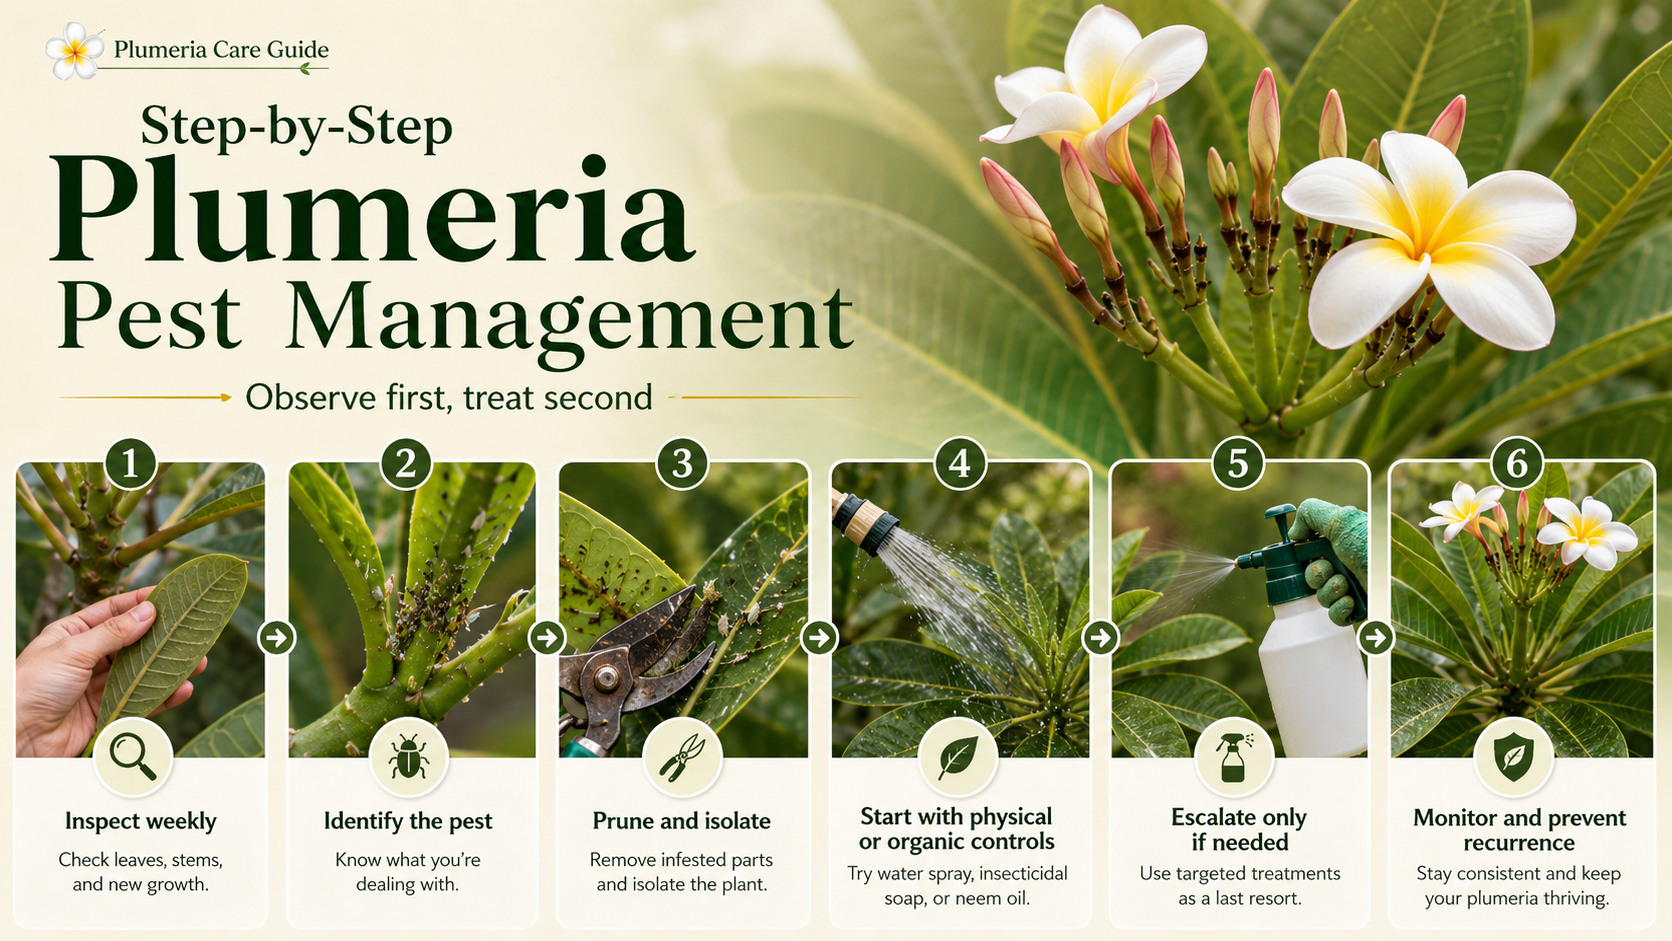
Beginner Note: Do Not Start With Peroxide
Hydrogen peroxide is sometimes useful for labeled sanitation or specific oxidizing-product uses, but it should not be the first beginner response to every pest, root, or disease problem. First identify the cause, isolate if needed, rinse or remove pests when appropriate, and use labeled products only when the problem calls for them.
Beginner Treatment Ladder
| Level | What to try | Why |
|---|---|---|
| 1 | Monitor and photograph. | Small or old damage may not need treatment. |
| 2 | Rinse, wipe, prune, or isolate. | Physical control often works for early pest pressure. |
| 3 | Correct stress and ants. | Stress and ant protection make pest problems worse. |
| 4 | Use low-impact targeted products if needed. | Oils, soaps, or biological controls may fit some pests when timed well. |
| 5 | Escalate to stronger labeled options only when justified. | Persistent or damaging pests may need more control, but safety and label limits come first. |
What Not To Do
- Do not spray every time a leaf looks bad. Why: many leaf marks are old damage, sunburn, disease, or water stress.
- Do not use oils or soaps in hot sun. Why: plumeria leaves can burn.
- Do not water the soil and think mites have been rinsed off. Why: mite control requires canopy attention, especially undersides.
- Do not use systemics without a confirmed target and label fit. Why: root, pollinator, and resistance risks matter.
- Do not skip follow-up. Why: eggs, crawlers, larvae, or hidden pests may remain.
Related Guide Pages
- Plumeria Pest & Disease Identification Guide
- Pest and Disease Inspection Checklist
- Treatment Safety Checklist
- Soil Drenches, Sprays, and Foliar Applications
- Pest Resistance and Rotation
Bottom Line
Beginner pest control is a sequence, not a single spray: inspect, identify, reduce stress, choose the least-disruptive control, follow the label, and monitor new growth.
Related Guides
- Plumeria Pest & Disease Identification Guide
- Pest and Disease Inspection Checklist: What to Look For Before You Treat
- Plumeria Treatment Decision Guide
- Treatment Safety Checklist: Before Using Sprays, Drenches, Oils, Soaps, or Systemics
- Integrated Pest Management (IPM) for Plumeria
- Beginner’s Guide to Plumeria Pest Control: Quick Start
Turn the explanation into an action plan
- Monitor
- Check the same marked leaves and nearby plants every three to seven days until no active pests or fresh damage remain.
- Change one thing
- Make the smallest justified correction, record the date, and avoid stacking treatments before you can see which one helped.
- Escalate when needed
- Seek local diagnostic help when damage accelerates despite treatment, borers enter major stems, or the pest cannot be identified.