
The Plumeria Pests and Diseases Guide is an essential resource for identifying, preventing, and treating the most common threats to plumeria plants, including pests, fungi, and environmental stressors. This guide offers detailed information on how to recognize early signs of trouble, from insect infestations to fungal infections, and provides practical solutions to address these issues. It also covers strategies for managing environmental factors such as excessive humidity, temperature fluctuations, and poor soil conditions, which can weaken plumeria. With expert tips on natural and chemical treatments, as well as proactive care practices, this guide ensures your plumeria remains healthy, resilient, and free from common ailments, allowing it to thrive season after season.
Mealybugs on Plumeria: Identification, Treatment and Prevention
What to check next
This guide helps you confirm that a living pest is present, identify where it is feeding, and choose a measured response without treating inactive damage. Read the detailed explanation, then use this sequence to decide what to do.
Confirm the evidence for mealybugs
- Look for
- White cottony insects or egg masses in tips, nodes, petiole joints, roots, and protected crevices, often with honeydew and ants.
- Compare with
- Mold, mineral residue, dried latex, and ordinary plant fibers do not move or reveal soft-bodied insects beneath the wax.
- Safest first response
- Isolate the plant, inspect both canopy and roots, physically remove visible colonies, and repeat checks for newly hatched insects.
Microclimate clue: Warm, sheltered, humid locations and crowded collections favor concealed colonies and repeated reinfestation.
- 1
Inspect before treating
Use bright light and magnification on leaf undersides, tips, petioles, stems, and the soil line.
- 2
- 3
Identify the feeding pattern
Separate sucking, chewing, mining, boring, and root-zone damage.
- 4
Start with the least disruptive action
Isolate, wash, and use only a treatment labeled for the confirmed pest and plant.
- 5
Repeat the inspection
Eggs or protected life stages can survive the first response, so follow-up checks matter.
How microclimate changes this answer
Dry heat favors mites, protected humid growth favors some scale and mealybugs, and wet shade increases snail and slug activity.
Compare this insect or pest pattern with healthy growth
Use these references to confirm that this article matches the visible pattern before changing care or applying a treatment.
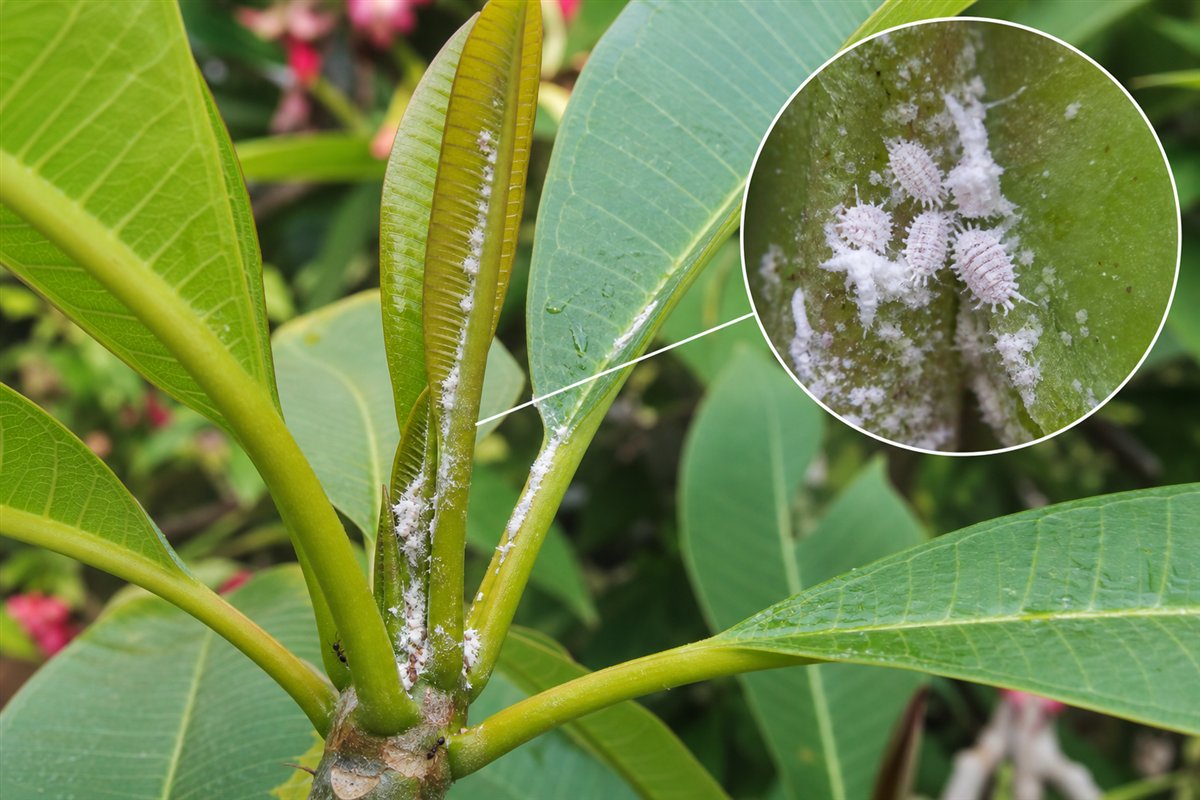 Condition reference
 Healthy baseline
- LocationCheck which plant part, age of growth, and exposed or protected side is affected.
- TextureDecide whether the evidence is dry, powdery, sticky, raised, translucent, soft, or intact.
- ProgressionPhotograph the same area so you can tell whether the pattern is stable, improving, or spreading.
Use more than one clue. Confirm the photo with recent conditions, roots, watering history, and the rest of the plant before acting.
Mealybugs are soft-bodied sap-feeding insects protected by white wax. On plumeria, they hide in tender tips, leaf bases, stem joints, protected crevices, and sometimes the root zone. Use this cornerstone guide to confirm the pest, choose the correct treatment level, and reach the detailed identification, treatment, prevention, or root-mealybug guide.
Mealybug Help Center
Choose the path that matches your situation
- Identify first when you are not certain the white material is a living pest.
- Treat leaf and stem mealybugs when active colonies are confirmed above the soil line.
- Consider the rare root-mealybug path only when white wax or insects are actually found around roots, pot walls, media, or drainage holes, or when unexplained decline continues without a canopy colony.
- Prevent recurrence after two consecutive inspections show no active colony.
Quick Answer
Confirm mealybugs by finding soft-bodied insects beneath white cottony or waxy material. Honeydew, sooty mold, ants, weak tender growth, and recurring colonies in protected joints support the identification. Isolate movable plants, remove exposed colonies, manage ants, and inspect neighboring plants. Escalate from physical control to predators or biological controls, organic-compatible contact products, and finally a labeled conventional product only when the infestation justifies it.
Start With Leaf and Stem Mealybugs
| Where the evidence appears | Most useful path | First action |
|---|---|---|
| Tips, leaf bases, petiole joints, stems, buds, or protected crevices | Leaf and stem mealybug identification and treatment | Isolate, inspect closely, and remove exposed colonies. |
| Roots, pot walls, media pockets, drainage holes, or the root crown | Root mealybug identification and treatment | Isolate the pot and inspect the root ball before using a foliar product. |
| Only white residue is visible and no insect is confirmed | Identification and look-alike comparison | Compare with mineral deposits, perlite, mold, dried latex, and ordinary plant fibers. |
| The plant declines but the canopy looks clean | Root-zone inspection | Check roots, moisture, drainage, and root pests before escalating treatment. |
What Mealybugs Look Like on Plumeria
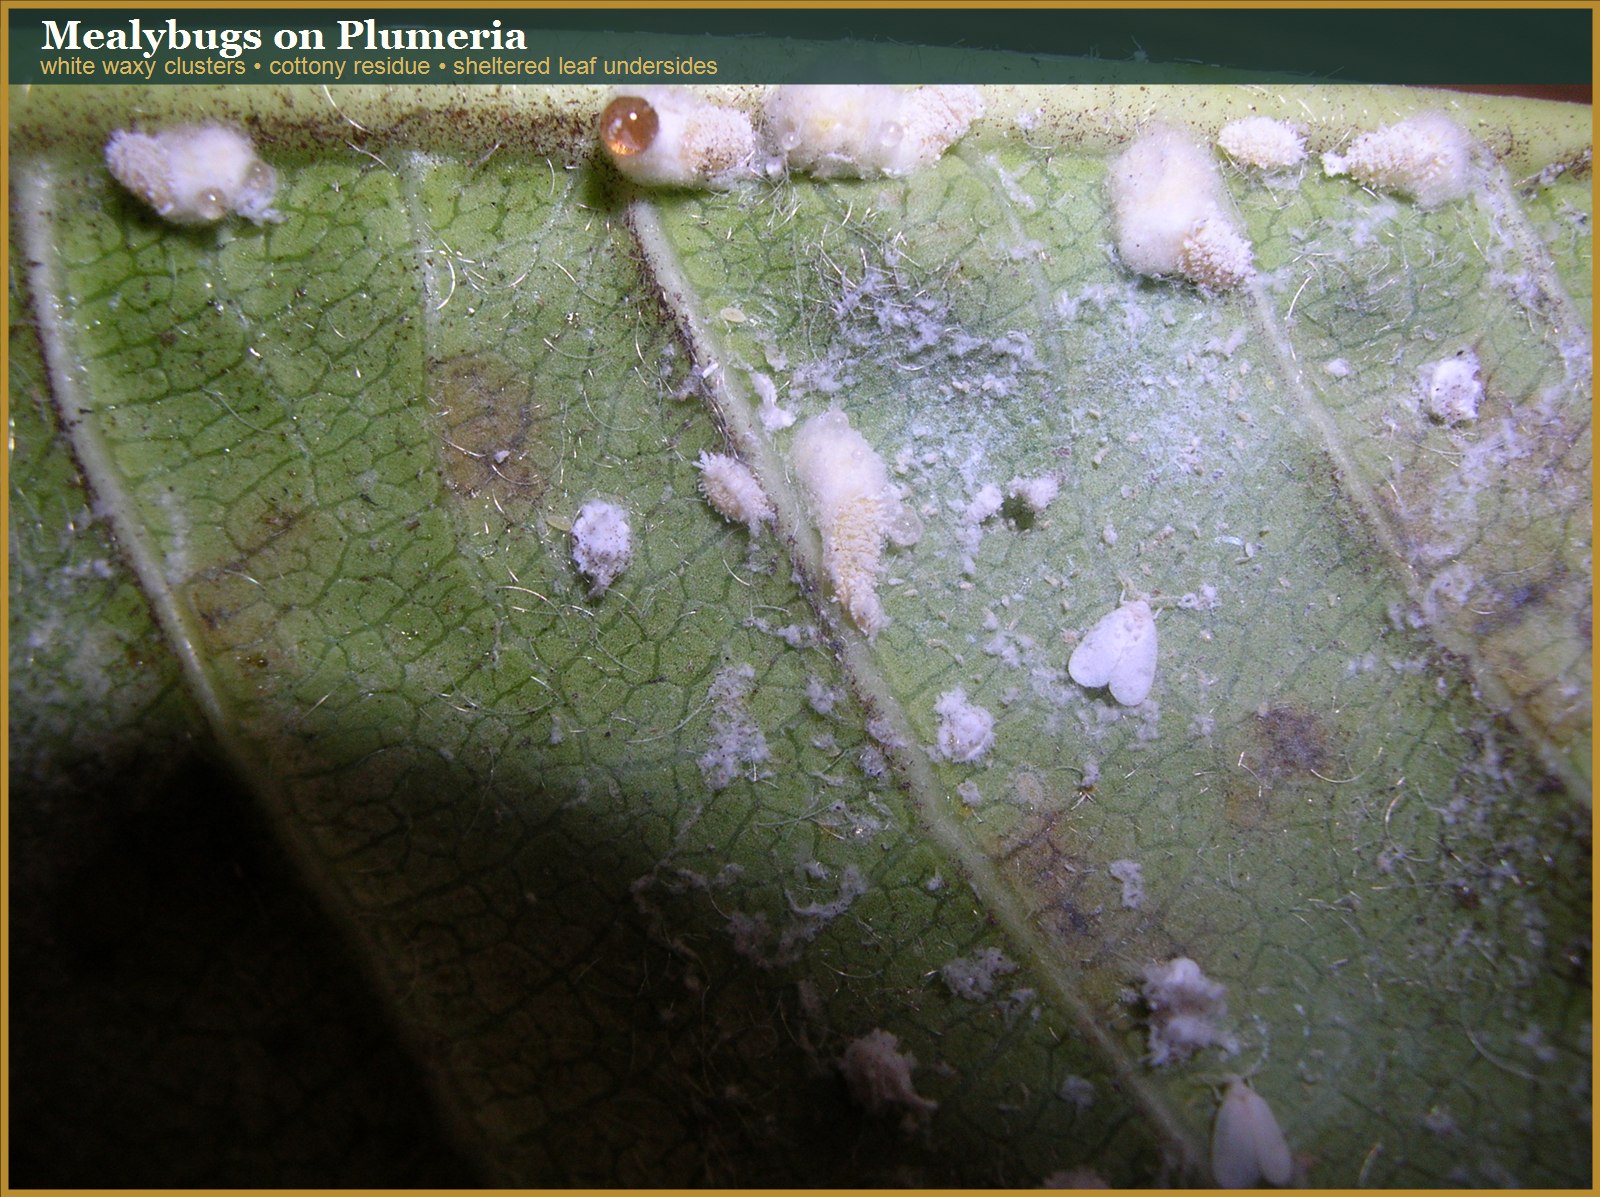
- Defining evidence: white cottony or wax-covered insects, egg masses, crawlers, or colonies in protected plant parts.
- Supporting evidence: sticky honeydew, black sooty mold, ants, distorted tender growth, yellowing, or weakening.
- Common look-alikes: hard scale covers, powdery mildew, mineral deposits, dried latex, perlite, fungal growth, and beneficial mealybug-destroyer larvae.
- Best confirmation: use magnification and gently separate the wax to find a soft-bodied insect underneath.
Open the detailed Mealybug Identification Guide when the evidence is not yet conclusive.
Treatment Ladder
Use one measured level at a time. Record what was used and inspect again before adding or changing products.
- Physical and cultural control: isolate, rinse or brush away exposed colonies, clean protected joints, control ants, reduce crowding, and avoid unnecessary high-nitrogen feeding.
- Predators and biological control: conserve lady beetles, lacewings, hoverfly larvae, spiders, and parasitoids. Purchased mealybug destroyers (Cryptolaemus montrouzieri) can be useful in warm protected environments when ants and incompatible pesticide residues are controlled.
- Organic-compatible contact choices: compare labeled insecticidal soap, horticultural oil, neem oil, azadirachtin, and suitable Beauveria bassiana products. Coverage, pest stage, heat, plant stress, and label restrictions determine success.
- Chemical last resort: where justified and legally labeled, compare insect growth regulators, systemics, or other targeted ornamental products by active ingredient and mode of action. Protect flowers, pollinators, predators, seedlings, cuttings, and stressed plants.
Suggested Treatment Products
Choose by active ingredient and current label, not by brand name alone. Confirm that the label includes mealybugs, ornamental plants or the intended site, and the planned application method. Test contact products on a small area first.
| Treatment level | What to look for | Best fit |
|---|---|---|
| First choice | Physical removal, a firm water rinse, or insecticidal soap containing potassium salts of fatty acids | Small or exposed colonies and active crawlers |
| Contact oil | A labeled horticultural mineral/paraffinic oil, neem oil, or azadirachtin product | Colonies that can be covered thoroughly; avoid heat and stressed plants |
| Biological | Cryptolaemus montrouzieri (mealybug destroyer), compatible lacewing larvae, or a labeled Beauveria bassiana product | Warm protected collections where ants and incompatible pesticide residues are controlled |
| Last resort | A labeled ornamental insect growth regulator or systemic active ingredient, such as pyriproxyfen, dinotefuran, or imidacloprid | Confirmed damaging infestations that remain active after safer measures; protect blooms, pollinators, and beneficial insects |
Do not buy or combine every product listed. Select one treatment level, follow its current label, record the application, and reinspect before repeating or escalating.
Open the complete Mealybug Treatment Guide for product categories, beneficial predators, chemical last-resort choices, compatibility cautions, and the Day 0 through Day 30 follow-up schedule.
Rare Exception: Root Mealybugs
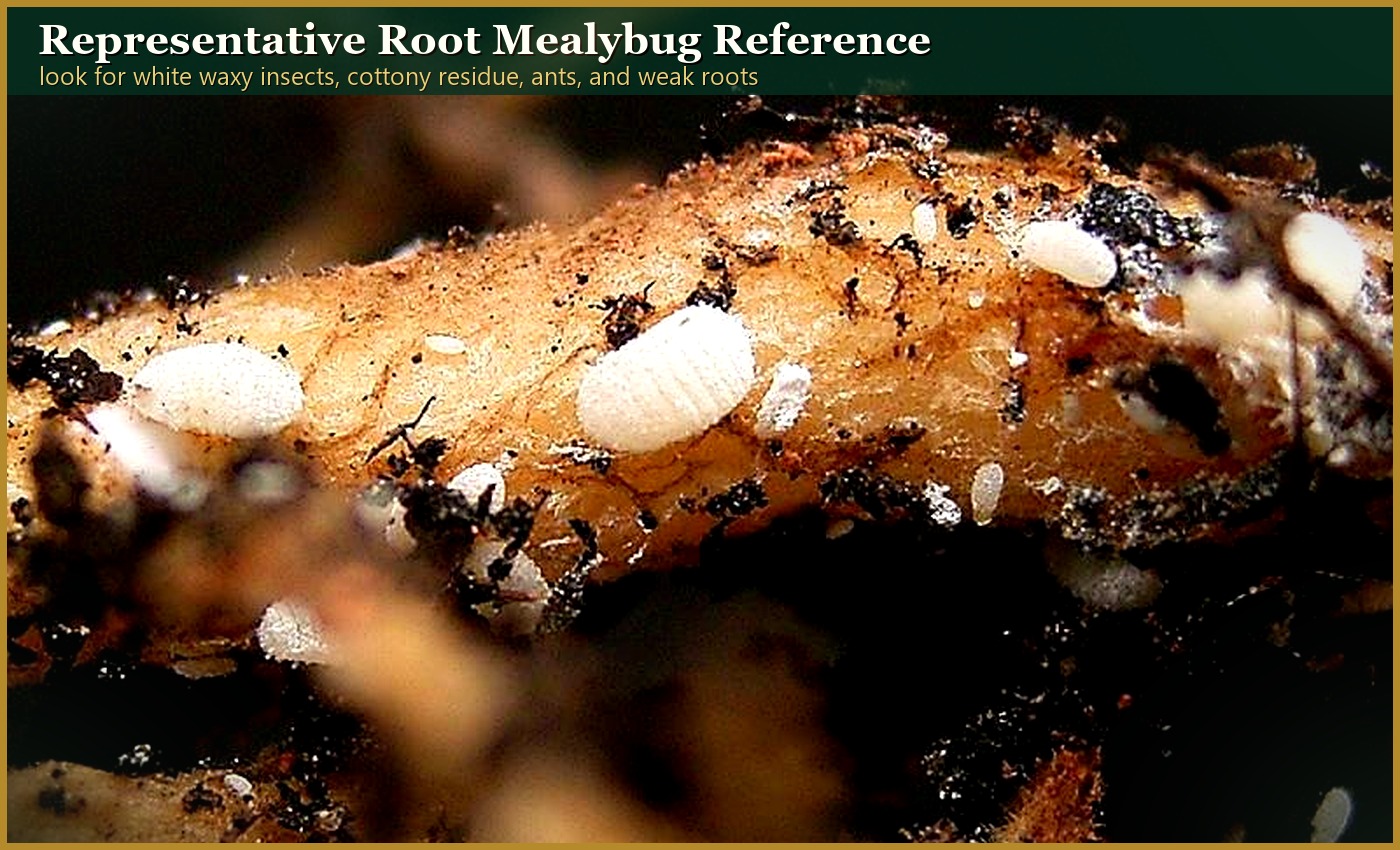
Root mealybugs rarely attack plumeria. Do not disturb a healthy root ball or apply a root-zone pesticide merely because canopy mealybugs are present. Consider this uncommon problem only when white wax or insects are actually found in the media, around roots, pot walls, drainage holes, or when unexplained decline continues without a convincing canopy colony. First compare the material with perlite, mineral deposits, and fungal growth. Then use the Root Mealybug Guide.
How to Know Treatment Is Working
- No new cottony colonies appear in protected joints.
- Live crawlers and honeydew decrease at each inspection.
- Ant activity declines after honeydew-producing colonies are controlled.
- New growth develops without expanding distortion or sticky residue.
- Two consecutive inspections are clear before the plant returns to the collection.
Prevent Mealybugs From Returning
- Quarantine and inspect new plants, cuttings, pots, and shared materials.
- Inspect tips, leaf bases, stem joints, pot rims, and drainage holes regularly.
- Manage ants and preserve beneficial predators.
- Clean tools, benches, and reusable containers.
- Avoid crowding and excessive soft growth caused by unnecessary nitrogen.
- Keep dated photographs and treatment records so old residue is not mistaken for active pests.
Open the detailed Mealybug Prevention Guide for quarantine, sanitation, monitoring, and seasonal prevention steps.
Mealybug Supporting Guides
- How to Identify Mealybugs on Plumeria – confirmation, photographs, and look-alikes.
- How to Treat Mealybugs on Plumeria – complete treatment ladder, products, predators, and follow-up.
- How to Prevent Mealybugs on Plumeria – quarantine, sanitation, ant management, and monitoring.
- How to Identify and Treat Root Mealybugs in Plumeria – a supporting guide for the uncommon case where root-zone evidence is present.
- Sap-Sucking Pest Comparison Checklist – compare mealybugs with scale, aphids, whiteflies, thrips, and mites.
- Treatment Safety Checklist – review before applying any product.
Frequently Asked Questions
Are mealybugs and scale the same?
No. Both are sap-feeding insects, but mealybugs are usually soft and waxy while scale commonly remains beneath a fixed cover. Correct identification matters because coverage, timing, and treatment choices differ.
Will one treatment eliminate mealybugs?
Usually not. Eggs, crawlers, and hidden colonies may survive the first response. Inspect on the schedule in the treatment guide and repeat only what the product label or biological-control plan requires.
Should I use a systemic insecticide?
Only as a last resort for a confirmed, persistent infestation when a current label allows the plant, pest, site, and application method. Consider flowering status, pollinators, beneficial insects, plant stress, and whether the colony is above or below the soil line.
Can beneficial insects control mealybugs?
They can suppress appropriate mealybug populations when ants are controlled and incompatible pesticide residues are absent. Mealybug destroyers, lacewing larvae, lady beetles, spiders, and matching parasitoids may help, but severe colonies often need physical cleanup first.
Course-of-action note: These steps provide the most logical path based on the evidence available. A photograph or symptom alone does not confirm the pest. Follow current product labels and local requirements.
Turn the explanation into an action plan
- Monitor
- Check the same marked leaves and nearby plants every three to seven days until no active pests or fresh damage remain.
- Change one thing
- Make the smallest justified correction, record the date, and avoid stacking treatments before you can see which one helped.
- Escalate when needed
- Seek local diagnostic help when damage accelerates despite treatment, borers enter major stems, or the pest cannot be identified.