
The Plumeria Pests and Diseases Guide is an essential resource for identifying, preventing, and treating the most common threats to plumeria plants, including pests, fungi, and environmental stressors. This guide offers detailed information on how to recognize early signs of trouble, from insect infestations to fungal infections, and provides practical solutions to address these issues. It also covers strategies for managing environmental factors such as excessive humidity, temperature fluctuations, and poor soil conditions, which can weaken plumeria. With expert tips on natural and chemical treatments, as well as proactive care practices, this guide ensures your plumeria remains healthy, resilient, and free from common ailments, allowing it to thrive season after season.
Grasshoppers on Plumeria: Identification, Treatment and Prevention
What to check next
This guide helps you confirm that a living pest is present, identify where it is feeding, and choose a measured response without treating inactive damage. Read the detailed explanation, then use this sequence to decide what to do.
Confirm the evidence for grasshoppers and katydids
- Look for
- Large uneven bites from leaf margins, missing flower tissue, and mobile chewing insects active by day or evening.
- Compare with
- Caterpillars, beetles, snails, slugs, and physical tearing can overlap, but leave different trails, frass, or edge patterns.
- Safest first response
- Inspect during the time damage is fresh, hand-remove isolated insects, and manage nearby vegetation if repeated feeding continues.
Microclimate clue: Dry weather and nearby grasses or weeds can increase movement into plumeria plantings.
- 1
Inspect before treating
Use bright light and magnification on leaf undersides, tips, petioles, stems, and the soil line.
- 2
- 3
Identify the feeding pattern
Separate sucking, chewing, mining, boring, and root-zone damage.
- 4
Start with the least disruptive action
Isolate, wash, and use only a treatment labeled for the confirmed pest and plant.
- 5
Repeat the inspection
Eggs or protected life stages can survive the first response, so follow-up checks matter.
How microclimate changes this answer
Dry heat favors mites, protected humid growth favors some scale and mealybugs, and wet shade increases snail and slug activity.
Compare this insect or pest pattern with healthy growth
Use these references to confirm that this article matches the visible pattern before changing care or applying a treatment.
 Condition reference
 Healthy baseline
- LocationCheck which plant part, age of growth, and exposed or protected side is affected.
- TextureDecide whether the evidence is dry, powdery, sticky, raised, translucent, soft, or intact.
- ProgressionPhotograph the same area so you can tell whether the pattern is stable, improving, or spreading.
Use more than one clue. Confirm the photo with recent conditions, roots, watering history, and the rest of the plant before acting.
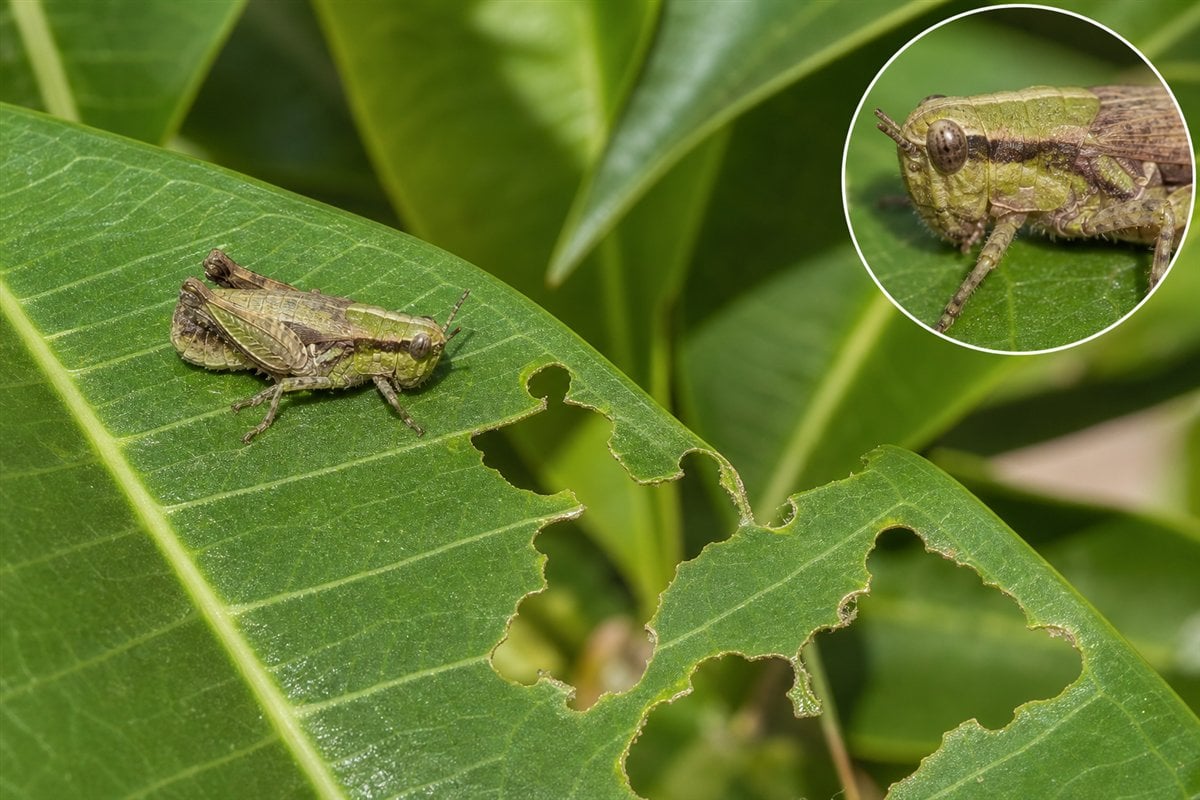
Use this guide when plumeria leaves, buds, flowers, or tender tips show large irregular chewing. Confirm an active grasshopper or other large chewer before treating because old holes remain after the insect has left.
1. Confirm Grasshopper Damage
| Clue | What it suggests |
|---|---|
| Large irregular holes or missing leaf edges | Consistent with grasshoppers, katydids, or another large chewing insect |
| Fresh pale or moist chewing edges | Damage is recent and the insect may still be present |
| Visible grasshopper, droppings, or repeated new damage | Stronger confirmation of active feeding |
| Fine stippling, silver scars, or tiny pinholes | More consistent with mites, thrips, leafhoppers, or a smaller feeder |
| Entry hole, sawdust-like frass, or internal stem collapse | Use the borer and longhorn beetle guide rather than this leaf-chewer guide |
2. Choose the Least Disruptive Treatment
- Remove visible insects. Hand-pick or capture one or a few insects when practical, especially during cooler periods when they are less active.
- Protect vulnerable plants. Use temporary insect netting that does not trap heat, restrict airflow, or rub tender growth. Check that insects are not enclosed inside.
- Reduce nearby pressure. Manage problem weeds and hiding places immediately around the growing area while preserving useful habitat for birds and other predators.
- Escalate only when necessary. Use a targeted pesticide only as a last resort and only when the label covers grasshoppers and the intended ornamental use site. Avoid open blooms and pollinator exposure, protect predators, and prevent drift and runoff.
Repellents and contact sprays may provide inconsistent control after large grasshoppers become highly mobile. Reinspect before repeating a product and judge success by the absence of fresh chewing.
3. Prevent Repeated Damage
- Inspect new plants and tender growth during periods of local grasshopper activity.
- Watch for young nymphs and fresh chewing before damage becomes widespread.
- Keep the immediate growing area free of excessive weeds and dense hiding places without eliminating all predator habitat.
- Protect seedlings and small plants with breathable physical barriers when pressure is predictable.
- Do not spray on a calendar when no active feeding is present.
4. Recheck Before Doing More
Old chewing cannot heal. Look for undamaged new leaves, no additional missing edges, and no fresh droppings or visible insects. If damage continues but no grasshopper is found, compare caterpillars, beetles, snails and slugs, earwigs, and physical damage before changing treatment.
Turn the explanation into an action plan
- Monitor
- Check the same marked leaves and nearby plants every three to seven days until no active pests or fresh damage remain.
- Change one thing
- Make the smallest justified correction, record the date, and avoid stacking treatments before you can see which one helped.
- Escalate when needed
- Seek local diagnostic help when damage accelerates despite treatment, borers enter major stems, or the pest cannot be identified.