
The Plumeria Pests and Diseases Guide is an essential resource for identifying, preventing, and treating the most common threats to plumeria plants, including pests, fungi, and environmental stressors. This guide offers detailed information on how to recognize early signs of trouble, from insect infestations to fungal infections, and provides practical solutions to address these issues. It also covers strategies for managing environmental factors such as excessive humidity, temperature fluctuations, and poor soil conditions, which can weaken plumeria. With expert tips on natural and chemical treatments, as well as proactive care practices, this guide ensures your plumeria remains healthy, resilient, and free from common ailments, allowing it to thrive season after season.
How to Identify Thrips on Plumeria
What to check next
This guide helps you confirm that a living pest is present, identify where it is feeding, and choose a measured response without treating inactive damage. Read the detailed explanation, then use this sequence to decide what to do.
Confirm the evidence for thrips
- Look for
- Slender fast-moving insects, dark specks of waste, silvery scraping, streaked petals, scarred buds, or distorted tender growth.
- Compare with
- Mites, wind abrasion, heat injury, poor pollination, and normal flower aging can create similar scarring.
- Safest first response
- Tap flowers or tips over white paper to confirm insects, remove spent blooms and debris, then use a labeled targeted control if needed.
Microclimate clue: Hot, dry weather and protected flowers can intensify thrips activity; rain may hide or suppress visible populations temporarily.
- 1
Inspect before treating
Use bright light and magnification on leaf undersides, tips, petioles, stems, and the soil line.
- 2
- 3
Identify the feeding pattern
Separate sucking, chewing, mining, boring, and root-zone damage.
- 4
Start with the least disruptive action
Isolate, wash, and use only a treatment labeled for the confirmed pest and plant.
- 5
Repeat the inspection
Eggs or protected life stages can survive the first response, so follow-up checks matter.
How microclimate changes this answer
Dry heat favors mites, protected humid growth favors some scale and mealybugs, and wet shade increases snail and slug activity.
Thrips decision path: Use the evidence below to decide whether thrips are a strong match before treating.
- Confirm: Tap a flower or tender leaf over white paper and look for slender moving insects. Confirm surface scarring, silvery streaks, distorted buds, or dark fecal specks; do not diagnose blossom midge without checking inside damaged buds for larvae.
- Start conservatively: Remove and seal badly damaged flowers or buds, clean fallen material, and isolate the plant when practical. Direct any contact treatment into protected flower and leaf crevices only when the product label permits it.
- Escalate only when justified: If active pests persist, choose a product specifically labeled for the pest and the treatment site. Follow the label for dilution, coverage, interval, maximum applications, protective equipment, and temperature limits. Test a small area first.
- Protect flowers and beneficial insects: Avoid spraying open blooms or treating when bees and other pollinators are visiting. Never combine products unless both labels expressly allow it.
- Monitor: Reinspect new buds, flowers, and tender leaves every 3 to 5 days through the active flush.
Microclimate check: Consider recent heat, rain, humidity, wind, indoor protection, plant stage, and whether the plumeria is potted or in-ground before choosing an action. These recommendations are a logical course based on observed evidence, not a guaranteed diagnosis.
Sap-Sucking Pest Diagnostic Path
Use this path when plumeria leaves look sticky, speckled, curled, dusty, bronzed, distorted, puckered, weak, or covered with honeydew or sooty mold. These pests overlap, so inspect undersides, tips, buds, stems, and protected joints before choosing a treatment.
- Start with the sap-sucking pest checklist to compare mites, mealybugs, scale, aphids, whiteflies, thrips, and leafhoppers.
- Check spider mites when leaves look stippled, dusty, bronzed, webbed, or stressed in hot dry weather.
- Check mealybugs when white cottony clusters, hidden colonies, honeydew, ants, or weak growth appear.
- Check scale insects when bumps stay attached to stems, leaves, petioles, or undersides.
- Check aphids when soft insects cluster on tender tips, buds, and new leaves.
- Check whiteflies when tiny white adults flutter from leaf undersides or honeydew and sooty mold appear.
- Check thrips when flowers, buds, or tender growth show silvery scarring, streaking, speckling, or distortion.
- Check leafhoppers when small jumping insects, marginal discoloration, puckered leaves, or fast-moving leaf pests are present.
Why it matters: Broad sprays can miss hidden pests or harm beneficial insects. Matching the pest to the symptom pattern helps you treat only what needs treatment.
Thrips are tiny, slender insects that scrape and feed on tender plant tissue. On plumeria, they are most often noticed on flowers, buds, and new growth because they can cause silvery scarring, streaks, specks, distorted petals, and bud damage before the insects are easy to see.
Thrips Article Path
Use this group in order when possible: identify the problem, treat only when needed, then prevent repeat outbreaks or recurrence.
- Identify thrips
How to Identify Thrips on Plumeria - Treat thrips
How to Treat Thrips on Plumeria - Prevent thrips
How to Prevent Thrips on Plumeria
Safety and diagnostics: before applying products, review the Treatment Safety Checklist. If symptoms do not match this group, return to the Pest & Disease Identification Guide.
Thrips are easy to miss because they hide in tight spaces. A good diagnosis combines symptoms, inspection of flowers and buds, and a simple tap test over white paper.
Identity note: Thrips belong to the order Thysanoptera. Exact species identification may require magnification, but the damage pattern on blooms and tender growth is often enough to guide inspection and early management.
Photo and Confirmation Checklist
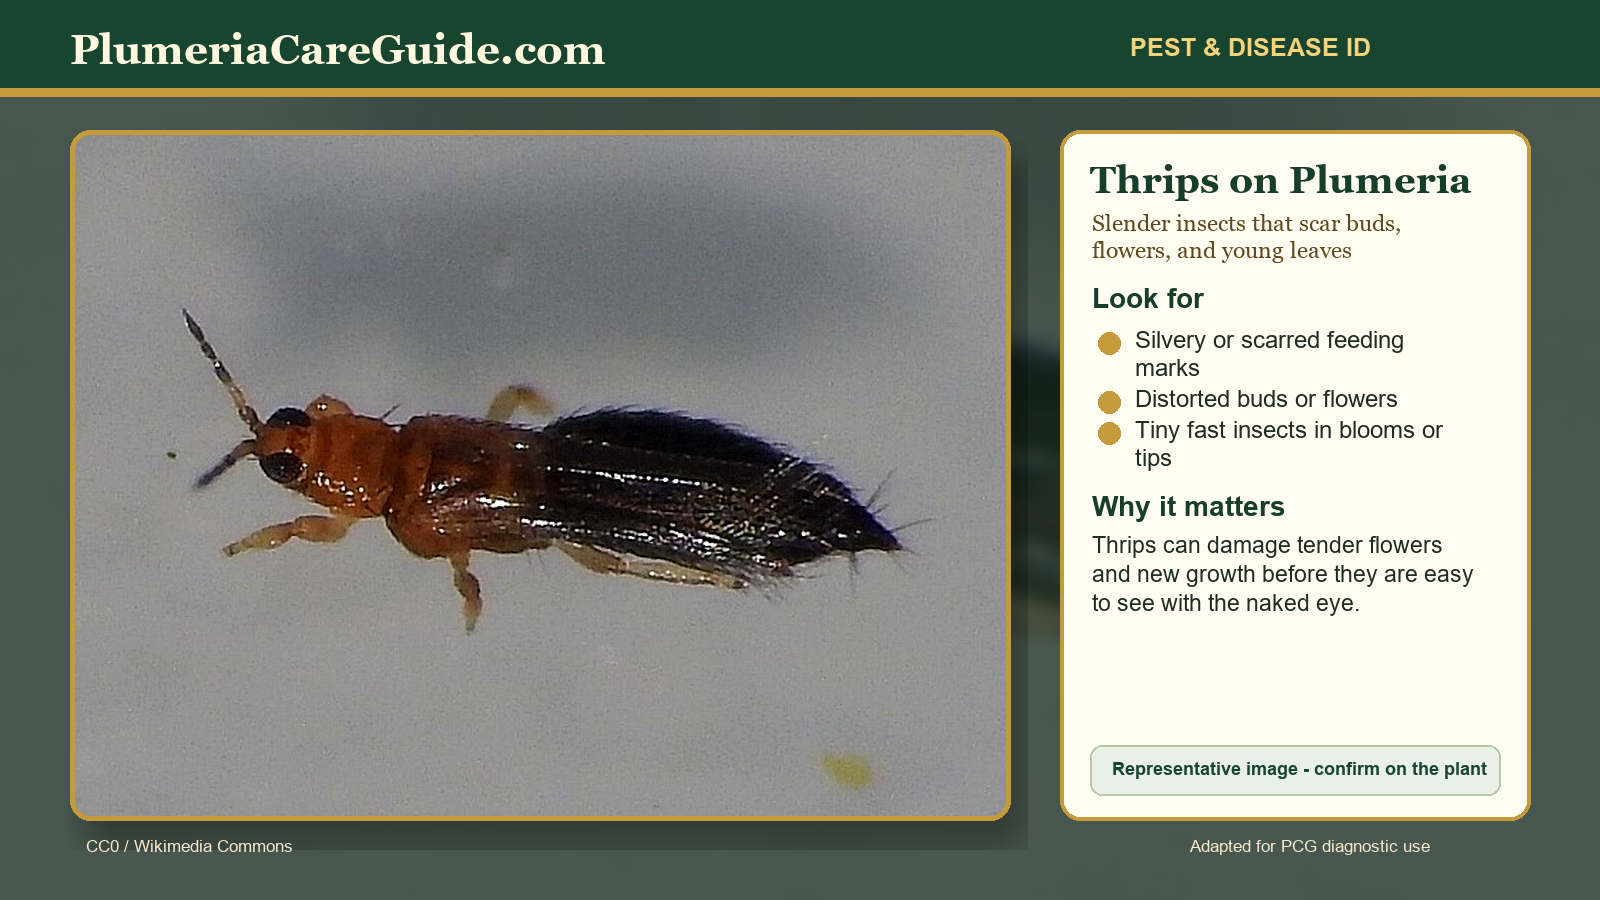
- Tap flowers or buds over white paper and look for tiny moving specks.
- Inspect petals, buds, and tender leaves for silvery streaking or rough scarring.
- Look for dark specks of frass on damaged flowers or leaves.
- Compare with mites, leafhoppers, sun scorch, and nutrient stress before treating.
Thrips Guide Path
- Identify thrips when flowers, buds, and tender leaves show silvery scarring, streaks, specks, distortion, or premature bud drop.
- Treat thrips when active insects are present and new damage is appearing on blooms or tender growth.
- Prevent thrips by inspecting buds, reducing plant stress, managing nearby weeds, and avoiding repeated broad sprays.
Quick ID
- Insect: Very small, slender insects that may look like tiny moving dashes.
- Location: Flowers, buds, tight tips, tender leaves, and protected folds.
- Flower damage: Silvery streaking, scarred petals, dark specks, distorted blooms, or bud drop.
- Leaf damage: Speckling, streaking, rough scarring, or distortion on tender growth.
- Best confirmation: Tap test over white paper plus active symptoms on flowers or new growth.
Thrips vs. Look-Alikes
- Spider mites: Usually cause fine stippling, bronzing, dusty leaves, and sometimes webbing.
- Leafhoppers: Jump or move sideways and often cause marginal yellowing or puckering.
- Aphids: Cluster on tender tips and produce sticky honeydew.
- Whiteflies: Flutter from leaf undersides and leave honeydew.
- Heat or sun injury: Can scar tissue, but it will not produce moving insects or black frass specks.
What Not to Do
- Do not judge only by damaged flowers. The why: old flower scarring remains after the insects move on.
- Do not ignore buds. The why: thrips often hide before open flowers show obvious damage.
- Do not assume all speckling is mites. The why: thrips, leafhoppers, and mites can overlap in symptoms.
Related Guides
- How to Treat Thrips on Plumeria
- How to Prevent Thrips on Plumeria
- Sap-Sucking Pest Checklist
- Pest and Disease Inspection Checklist
- Treatment Safety Checklist
Turn the explanation into an action plan
- Monitor
- Check the same marked leaves and nearby plants every three to seven days until no active pests or fresh damage remain.
- Change one thing
- Make the smallest justified correction, record the date, and avoid stacking treatments before you can see which one helped.
- Escalate when needed
- Seek local diagnostic help when damage accelerates despite treatment, borers enter major stems, or the pest cannot be identified.