
The Plumeria Pests and Diseases Guide is an essential resource for identifying, preventing, and treating the most common threats to plumeria plants, including pests, fungi, and environmental stressors. This guide offers detailed information on how to recognize early signs of trouble, from insect infestations to fungal infections, and provides practical solutions to address these issues. It also covers strategies for managing environmental factors such as excessive humidity, temperature fluctuations, and poor soil conditions, which can weaken plumeria. With expert tips on natural and chemical treatments, as well as proactive care practices, this guide ensures your plumeria remains healthy, resilient, and free from common ailments, allowing it to thrive season after season.
Plumeria Borer and Longhorn Beetle: Identification, Treatment and Prevention
What to check next
This guide helps you confirm that a living pest is present, identify where it is feeding, and choose a measured response without treating inactive damage. Read the detailed explanation, then use this sequence to decide what to do.
Confirm the evidence for beetle damage
- Look for
- Adult beetles, notched or skeletonized leaves, flower feeding, bore holes, or larvae associated with roots or damaged wood.
- Compare with
- Caterpillars, grasshoppers, leafcutter bees, weevils, and snails produce different feeding edges and activity periods.
- Safest first response
- Identify the beetle and life stage before treating; hand removal and nighttime inspection may be sufficient for occasional adults.
Microclimate clue: Seasonal flights, rain, nearby turf or host plants, and nighttime activity can make beetle damage appear suddenly.
- 1
Inspect before treating
Use bright light and magnification on leaf undersides, tips, petioles, stems, and the soil line.
- 2
- 3
Identify the feeding pattern
Separate sucking, chewing, mining, boring, and root-zone damage.
- 4
Start with the least disruptive action
Isolate, wash, and use only a treatment labeled for the confirmed pest and plant.
- 5
Repeat the inspection
Eggs or protected life stages can survive the first response, so follow-up checks matter.
How microclimate changes this answer
Dry heat favors mites, protected humid growth favors some scale and mealybugs, and wet shade increases snail and slug activity.
The plumeria stem borer is the larval stage of a longhorn beetle that feeds inside branches and stems. Entry holes, frass, tunnels, wilting tips, internal damage, and sudden branch weakness are the important clues. Once larvae are inside the stem, ordinary surface sprays do not reach them.
Quick Answer
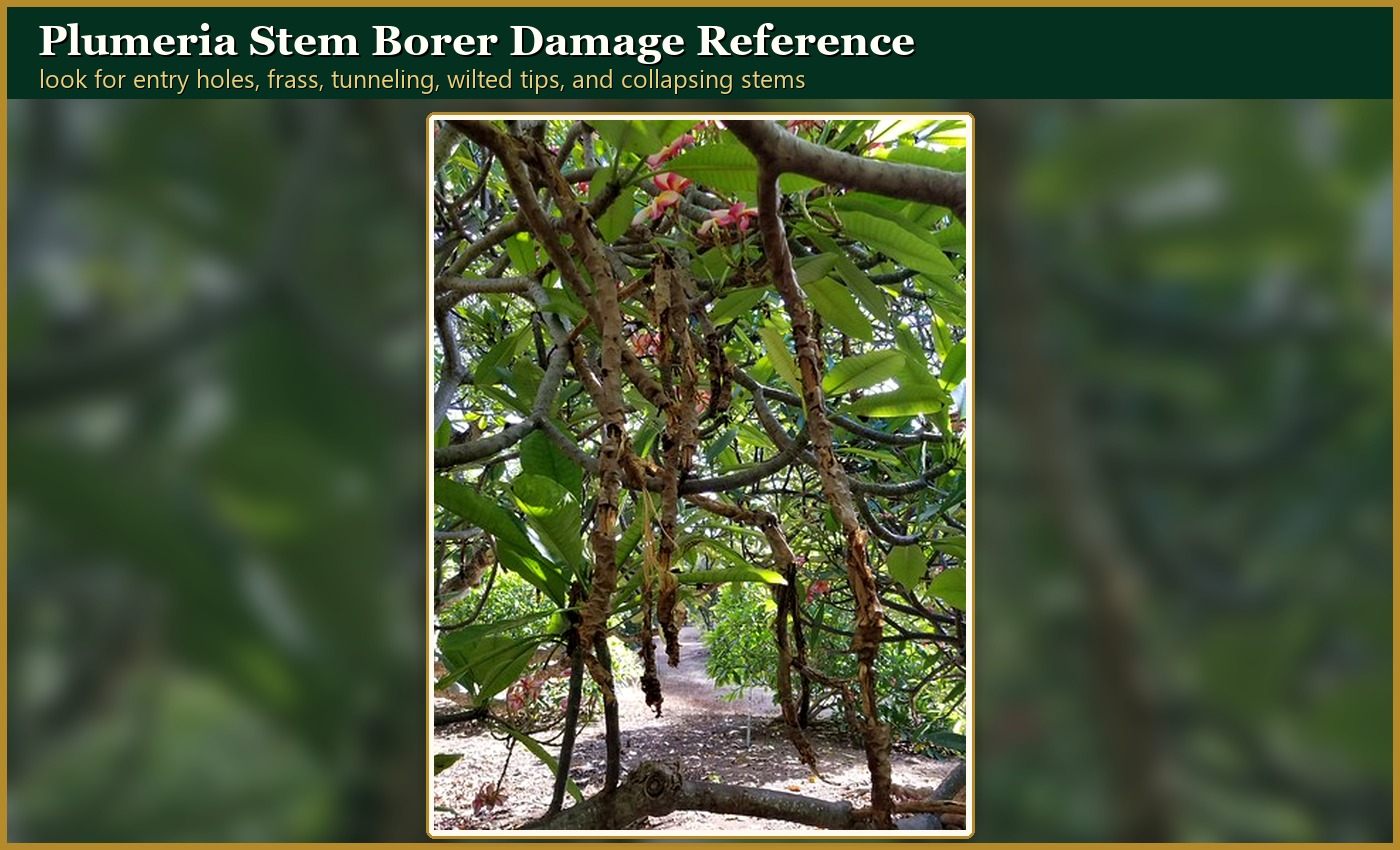
Borer Damage or a Look-Alike?
| Evidence | What it suggests | Next step |
|---|---|---|
| Entry hole with fresh frass, tunnel, or larva | Active borer damage is a strong match. | Follow the pruning and disposal sequence promptly. |
| Soft dark tissue with odor but no hole or frass | Stem rot may be more likely. | Use the disease and rot checker before assuming an insect. |
| Dry pale or corky surface on the sun-facing side | Sunburn or environmental injury may be more likely. | Inspect the internal tissue before cutting deeply. |
| Clean break after wind, weight, or impact | Physical damage may be primary. | Stabilize the branch and use clean wound-management steps. |
| Wilting tip without visible evidence | Roots, water, rot, vascular injury, or hidden tunneling may overlap. | Inspect methodically and avoid blind pesticide treatment. |
Immediate Treatment Sequence
- Protect yourself: wear gloves and eye protection because plumeria latex can irritate skin and eyes.
- Stabilize the branch: prevent an internally weakened branch from falling or tearing healthy tissue.
- Photograph and confirm: record holes, frass, soft areas, cracking, and the point where symptoms begin.
- Prune in stages: cut below the suspected tunnel and inspect the cross-section. Continue toward the trunk only until the tissue is sound and free of tunneling, frass, larvae, and internal discoloration.
- Clean tools between cuts: remove sap and debris and disinfect the cutting surface before moving to another branch or plant.
- Contain the wood: bag or otherwise securely contain the infested section and destroy or dispose of it according to local rules. Do not store or share it as propagation material.
- Protect the remaining plant: keep the cut dry with good airflow, avoid water collecting on the wound, and reduce other plant stress without overwatering or overfertilizing.
Why Spraying Is Not the Main Treatment
The destructive larva is protected inside the stem, where contact insecticides are ineffective. University of Hawaii guidance recommends immediate removal and destruction of affected branches; frequent spraying to prevent every adult egg-laying event is not practical. No product should be presented as a substitute for removing confirmed infested wood.
Follow-Up Schedule
- Immediately: confirm, prune, contain, destroy, clean tools, and inspect adjacent branches.
- Days 2-3: check the cut and nearby stems for moisture, discoloration, new frass, or wilting.
- Day 7: inspect the entire plant and nearby plumerias for fresh holes or debris.
- Weeks 2-6: continue weekly checks because another branch or plant may show delayed evidence.
Detailed Borer Guides
- How to Identify Plumeria Borer Damage – holes, frass, tunnels, collapse, and look-alikes.
- How to Treat Plumeria Borer Damage – staged pruning, clean tissue confirmation, tool sanitation, and disposal.
- How to Prevent Plumeria Borer Damage – stress reduction, inspection, wound care, quarantine, and early removal.
Reference basis: University of Hawaii CTAHR Plumeria guide.
Before Cutting, Confirm the Extent
- Old dry hole, firm branch, no new frass: mark and monitor before cutting.
- Active tunnel confined to a removable branch: prune below the tunnel into clean, firm tissue and securely discard the infested wood.
- Soft, wet, black, or foul-smelling tissue: include the disease and rot path because cutting only the visible hole may miss advancing decay.
- Main trunk, several structural branches, or an overhead limb: stop before major removal and obtain local extension, arborist, or experienced professional help.
Turn the explanation into an action plan
- Monitor
- Check the same marked leaves and nearby plants every three to seven days until no active pests or fresh damage remain.
- Change one thing
- Make the smallest justified correction, record the date, and avoid stacking treatments before you can see which one helped.
- Escalate when needed
- Seek local diagnostic help when damage accelerates despite treatment, borers enter major stems, or the pest cannot be identified.