
The Plumeria Pests and Diseases Guide is an essential resource for identifying, preventing, and treating the most common threats to plumeria plants, including pests, fungi, and environmental stressors. This guide offers detailed information on how to recognize early signs of trouble, from insect infestations to fungal infections, and provides practical solutions to address these issues. It also covers strategies for managing environmental factors such as excessive humidity, temperature fluctuations, and poor soil conditions, which can weaken plumeria. With expert tips on natural and chemical treatments, as well as proactive care practices, this guide ensures your plumeria remains healthy, resilient, and free from common ailments, allowing it to thrive season after season.
Blossom Midge on Plumeria: Identification, Treatment and Prevention
What to check next
This guide helps you confirm that a living pest is present, identify where it is feeding, and choose a measured response without treating inactive damage. Read the detailed explanation, then use this sequence to decide what to do.
Confirm the evidence for blossom midges
- Look for
- Buds that yellow, distort, or drop prematurely with tiny larvae or feeding damage inside the bud tissue.
- Compare with
- Thrips, heat, drought, prolonged rain, bloom rot, and ordinary bud abortion can also cause flower-bud loss.
- Safest first response
- Open several affected buds to confirm larvae, collect and discard fallen buds, and reduce the life cycle before considering a labeled treatment.
Microclimate clue: Warm humid periods and fallen infested buds can sustain repeated midge generations around flowering plants.
- 1
Inspect before treating
Use bright light and magnification on leaf undersides, tips, petioles, stems, and the soil line.
- 2
- 3
Identify the feeding pattern
Separate sucking, chewing, mining, boring, and root-zone damage.
- 4
Start with the least disruptive action
Isolate, wash, and use only a treatment labeled for the confirmed pest and plant.
- 5
Repeat the inspection
Eggs or protected life stages can survive the first response, so follow-up checks matter.
How microclimate changes this answer
Dry heat favors mites, protected humid growth favors some scale and mealybugs, and wet shade increases snail and slug activity.
Compare this insect or pest pattern with healthy growth
Use these references to confirm that this article matches the visible pattern before changing care or applying a treatment.
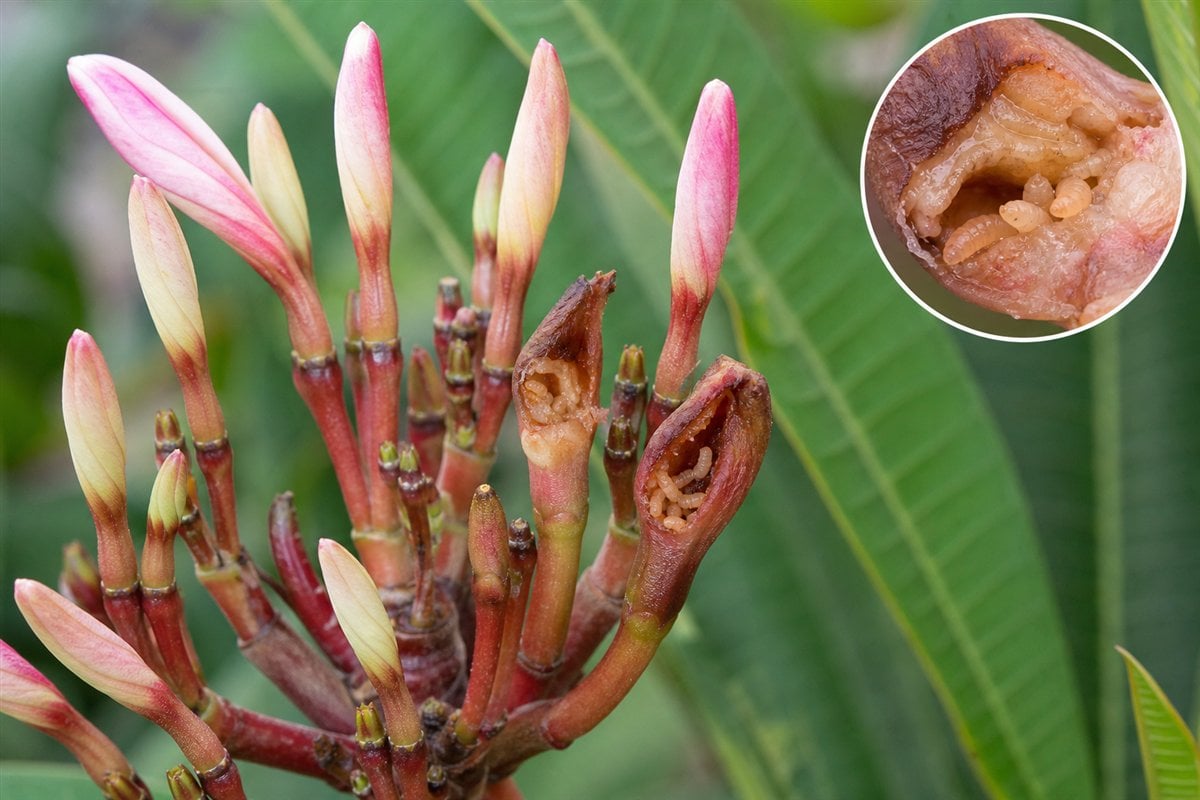 Condition reference
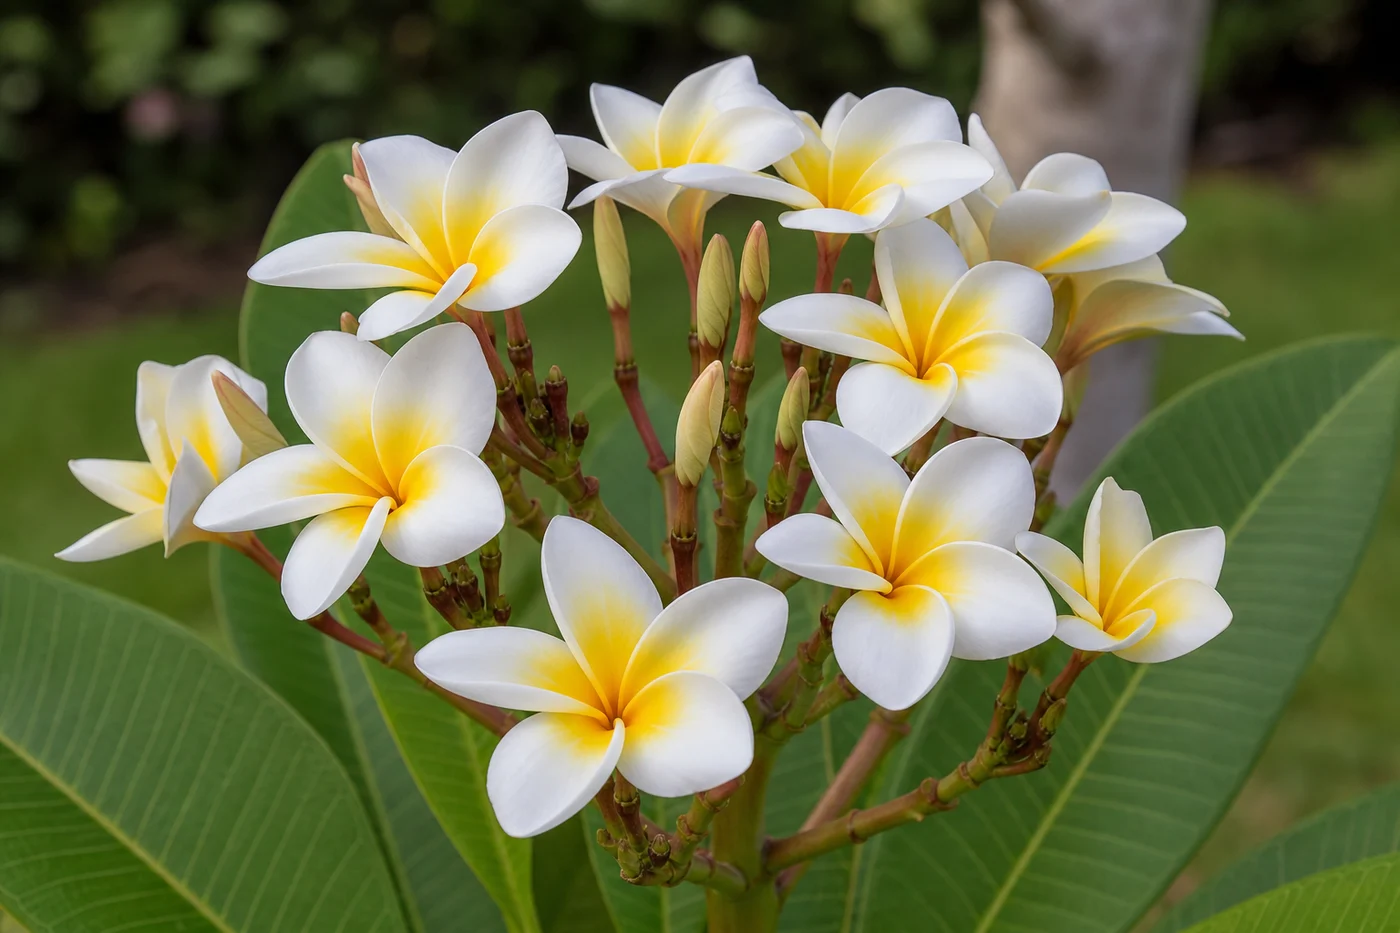 Healthy baseline
- LocationCheck which plant part, age of growth, and exposed or protected side is affected.
- TextureDecide whether the evidence is dry, powdery, sticky, raised, translucent, soft, or intact.
- ProgressionPhotograph the same area so you can tell whether the pattern is stable, improving, or spreading.
Use more than one clue. Confirm the photo with recent conditions, roots, watering history, and the rest of the plant before acting.
Blossom midge larvae feed inside unopened plumeria flower buds, where they can cause discoloration, deformation, failed opening, and premature bud or blossom drop. This overview helps you confirm internal feeding, act on the vulnerable parts of the life cycle, and avoid unnecessary treatments for weather injury, thrips, or ordinary bud failure.
Quick Answer
Why the Life Cycle Changes Treatment
| Stage | Where it is | Management implication |
|---|---|---|
| Egg | Placed through the opening of a young flower bud | Early bud monitoring matters because symptoms may not be obvious yet. |
| Larva | Protected inside the bud while feeding | Contact sprays may not reach it; remove and contain the entire infested bud. |
| Pupa | Usually protected in soil after the larva leaves the bud | Collect fallen buds promptly so mature larvae do not complete the cycle below. |
| Adult | Small exposed flying midge near host plants | This is the stage most exposed to contact treatment, but timing and identification are difficult. |
Blossom Midge or a Look-Alike?
- Thrips: more often leave surface rasping, silvery scars, black specks, damaged pollen, and slender insects in flowers.
- Weather injury: heat, rain, humidity, cold, or abrupt changes can brown or abort buds without larvae.
- Blossom midge: becomes much more likely when larvae and internal feeding are found inside a fresh damaged bud.
- Normal bud failure: occasional bud loss can follow plant stress, relocation, root problems, or changing bloom load.
Safest Management Order
- Confirm the evidence inside more than one fresh damaged bud.
- Remove damaged and unopened infested buds from the plant.
- Collect every fallen bud and flower beneath the plant.
- Seal suspect material in a bag or container; do not leave it in an open compost pile.
- Inspect new buds frequently and record whether fresh damage continues.
- Consider a pesticide only after confirmation and only when its current label permits the pest, ornamental plant or site, and application method.
Detailed Blossom Midge Guides
- How to Identify Blossom Midge Damage – photographs, bud-opening steps, larvae, and look-alikes.
- How to Treat Blossom Midge – the sanitation sequence, containment, monitoring, and cautious escalation.
- How to Prevent Blossom Midge – early bud checks, cleanup, quarantine, and seasonal records.
Reference basis: University of Hawaii CTAHR blossom midge guidance.
Turn the explanation into an action plan
- Monitor
- Check the same marked leaves and nearby plants every three to seven days until no active pests or fresh damage remain.
- Change one thing
- Make the smallest justified correction, record the date, and avoid stacking treatments before you can see which one helped.
- Escalate when needed
- Seek local diagnostic help when damage accelerates despite treatment, borers enter major stems, or the pest cannot be identified.