
Welcome to the Plumeria Cultivation & Planting Guide. This is your definitive starting point for turning rooted cuttings, seedlings, or mature specimens into thriving, bloom-laden trees. Inside, you’ll learn how to choose the ideal micro-climate. You will craft well-draining soil mixes. Mastering container-versus-in-ground decisions is also included. You will time each planting task to your growing zone. Step-by-step instructions guide each aspect of planting. Troubleshooting checkpoints help resolve common issues. Nutrition tips based on science ensure your plumeria has strong roots, vigorous growth, and abundant flowers. Whether you garden on a balcony or use raised beds, this guide offers decades of practical experience. It is also helpful if you maintain a full grove. It turns that knowledge into practical, easy-to-follow advice. The guide empowers beginners and seasoned collectors alike to cultivate with confidence.
Stem Rot: Symptoms & Remedies
What to check next
This guide helps you connect growth habit, light, roots, water, nutrition, season, and cultivar traits before trying to correct the whole plant. Read the detailed explanation, then use this sequence to decide what to do.
- 1
Describe the whole pattern
Compare height, branching, canopy density, leaf size, flowering, leaning, and vigorous areas.
- 2
Check the foundation
Inspect anchorage, container size, roots, drainage, and the amount and direction of light.
- 3
Compare season and cultivar
Confirm whether the habit is new, worsening, seasonal, or normal for the variety.
- 4
Correct the strongest limiter
Address the clearest root, light, structural, moisture, or nutrition limitation first.
- 5
Measure new growth
Use dated photos, internode length, branching, and the next leaf flush to judge progress.
How microclimate changes this answer
A sheltered wall, partial canopy, wind, container heat, and winter storage can shape the plant more than its regional Zone.
Compare this disease or rot pattern with healthy growth
Use these references to confirm that this article matches the visible pattern before changing care or applying a treatment.
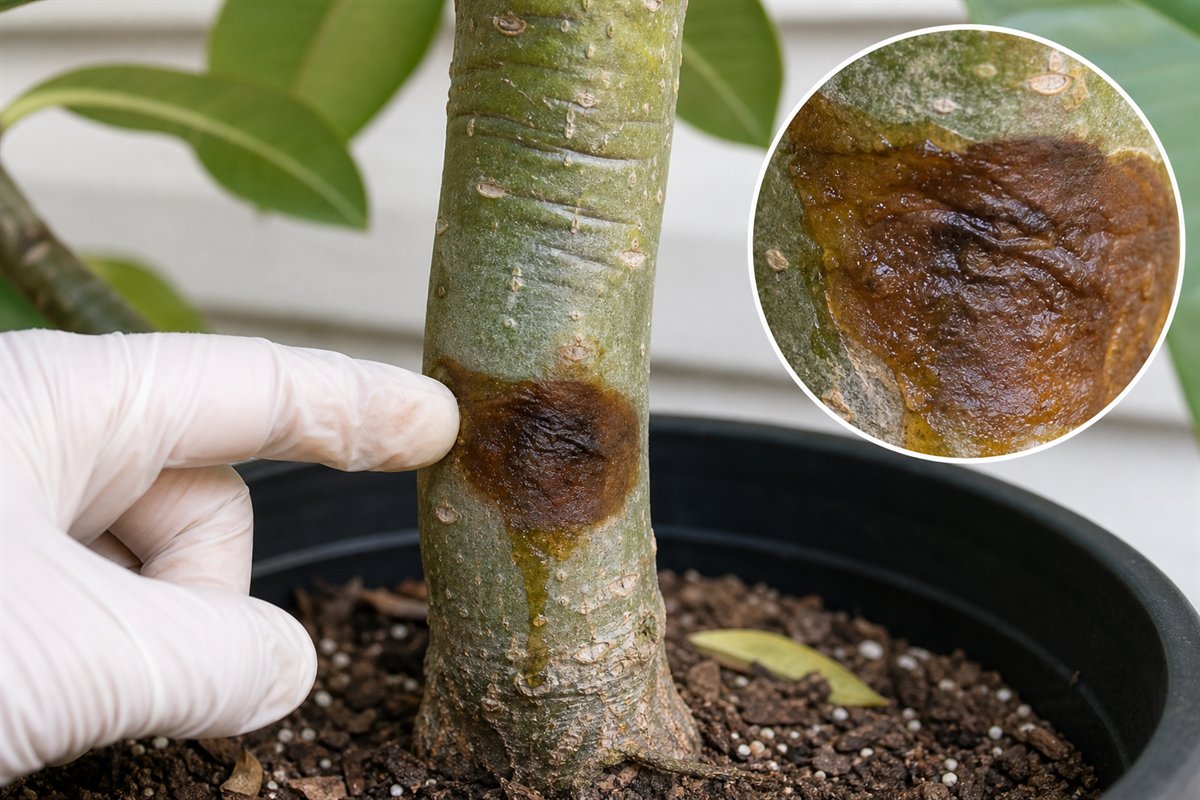 Condition reference
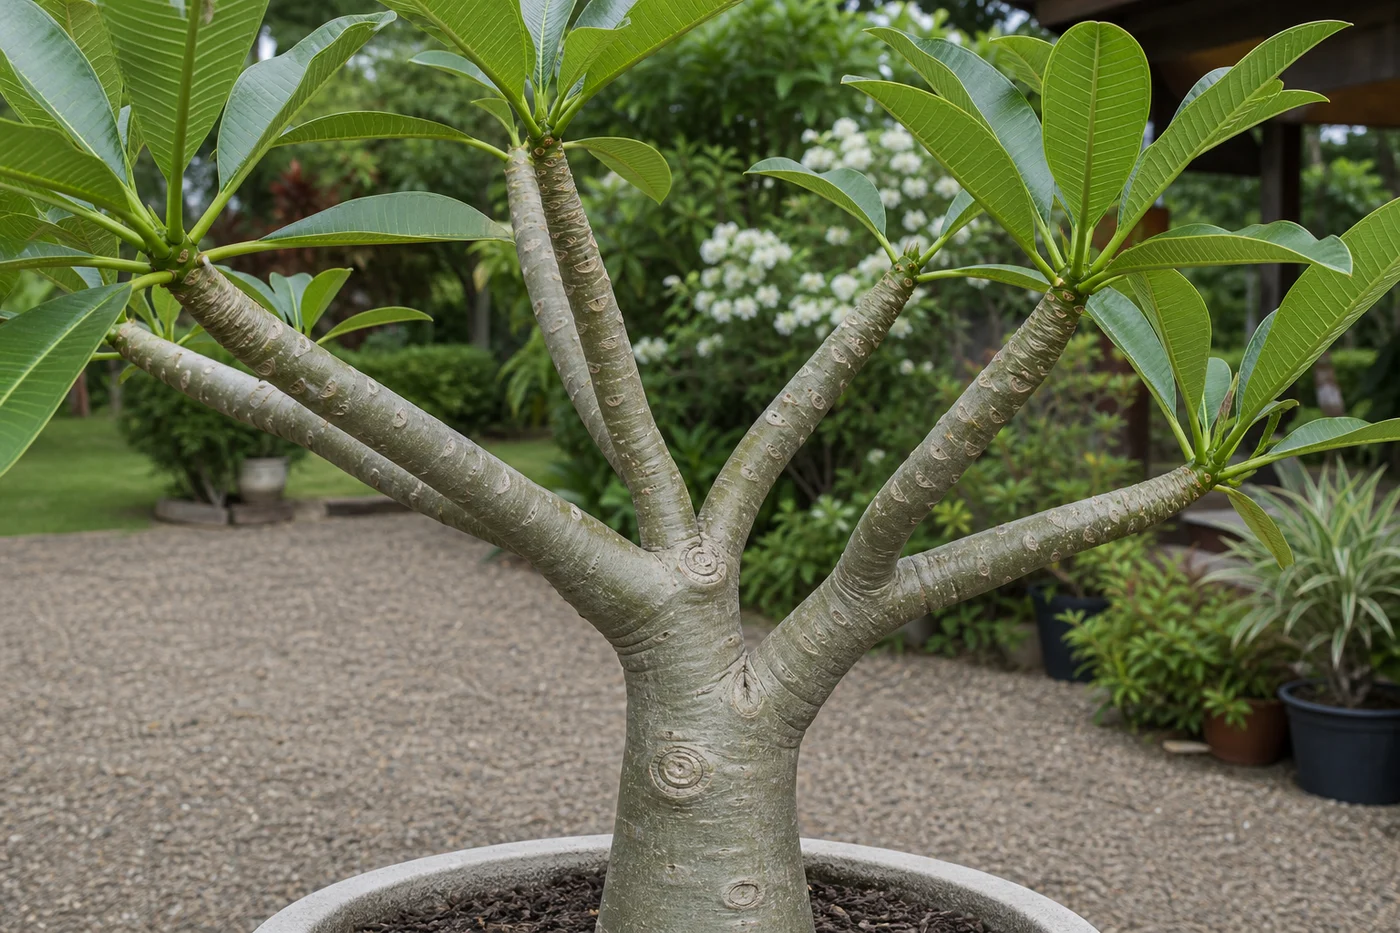 Healthy baseline
- LocationCheck which plant part, age of growth, and exposed or protected side is affected.
- TextureDecide whether the evidence is dry, powdery, sticky, raised, translucent, soft, or intact.
- ProgressionPhotograph the same area so you can tell whether the pattern is stable, improving, or spreading.
Use more than one clue. Confirm the photo with recent conditions, roots, watering history, and the rest of the plant before acting.
START WITH THE COMPLETE GUIDE
Stem Rot on Plumeria
This article covers one focused part of the subject. Begin with the complete Stem Rot guide to confirm the problem, choose the correct treatment path, and reach the related identification and prevention steps.
Stem Rot: Symptoms & Remedies
How to Identify, Treat, and Prevent One of the Most Serious Diseases in Plumeria
Stem rot is one of the most common—and most destructive—conditions affecting plumeria. Caused by opportunistic fungal or bacterial pathogens, it typically enters through wounds, pruning cuts, or waterlogged tissue, then spreads rapidly through soft stem tissue. Without quick intervention, stem rot can lead to tip collapse, hollow branches, root failure, and even loss of the entire plant.
This guide will help you identify early symptoms, understand causes, and apply proven treatment and prevention strategies to manage stem rot in plumeria.
What Is Stem Rot?
Stem rot is a soft-tissue infection, typically caused by fungal (Fusarium, Phytophthora) or bacterial pathogens that enter through:
- Pruning wounds
- Insect feeding sites (especially mealybugs, mites, or rust mites)
- Excess moisture or poor drainage
- Damaged or sunburned tissue
Rot begins in internal vascular tissue, spreads through the pith and cambium layers, and can go unnoticed until the outside of the branch collapses or turns black and mushy.
Early Symptoms of Stem Rot
| Symptom | Description |
|---|---|
| Darkening of tip or node | Appears bruised or blackish |
| Softness at base or tip | Spongy, collapses with pressure |
| Wrinkled stems despite watering | Rot impairs water uptake |
| Brown or black rings inside cut tissue | Internal spread of fungal pathogens |
| Foul or fermented smell when cut | Indicates bacterial presence |
| Leaf wilt or yellowing | Often starts near the affected stem |
| Leaf drop from otherwise healthy plants | Signals internal stress |
Immediate Steps When You Suspect Rot
- Stop watering the affected plant, moisture accelerates the spread
- Inspect the entire stem from tip to base for softness or discoloration
- If softness is confirmed, prepare to cut back to healthy tissue (see below)
- Use sterilized tools to prevent spreading pathogens
How to Excise and Treat Stem Rot
Tools & Materials:
- Sharp pruning knife or loppers (sterilized with alcohol or flame)
- Powdered sulfur or cinnamon (natural fungicides)
- Hydrogen peroxide (3%) or 10% bleach solution for surface disinfection
- Paper towels, clean gloves, and a disposal bag
Step-by-Step Removal:
- Cut back the affected stem several inches below any discoloration or softness
- Check the cut surface—center should be bright white and firm
- If still dark or soft, keep cutting until you reach healthy tissue
- Dip the cut end in powdered sulfur or cinnamon
- Let the cut end dry in a shaded, dry, ventilated area for 5–7 days
- Do not replant or water until fully calloused and dry
- For container plants, refresh the soil if rot has reached the base
Can I Save a Plant with Stem Rot?
Yes—if caught early, most plumeria can recover. You must:
- Remove all infected tissue
- Improve airflow and sun exposure
- Keep the soil dry until healthy growth resumes
- Apply systemic fungicide or cinnamon drench around the base only if the rot has reached the roots
If rot has reached the base of the trunk, take cuttings from healthy branches and re-root them—this is often the only way to save the genetics of a severely infected plant.
Prevention Strategies
| Practice | Purpose |
|---|---|
| Use Excalibur fertilizer or low-nitrogen blends | Promotes thick, rot-resistant growth |
| Avoid overwatering, especially in dormant season | Most stem rot starts with excess moisture |
| Use bark-based soil mixes for fast drainage | |
| Always sterilize pruning tools | |
| Keep mulch 2–3 inches away from trunk base | |
| Treat fresh cuts with sulfur or cinnamon | |
| Avoid pruning during extended rainy/humid periods | |
| Watch for mealybugs, mites, and ants, which spread rot indirectly |
Common Myths About Stem Rot
| Myth | Reality |
|---|---|
| “Only overwatering causes rot” | Rot can also enter through wounds or insect damage |
| “Sulfur cures all rot” | Sulfur prevents and slows spread, but infected tissue must still be removed |
| “Black tip is harmless discoloration” | Black tips often indicate the start of a deeper stem infection |
| “Drying out will fix it” | Only if the rot hasn’t reached inner tissue—cutting is often still required |
Conclusion
Stem rot is serious, but with fast diagnosis and the right pruning and treatment techniques, most plumeria can recover fully. Stay proactive: maintain excellent drainage, apply protective treatments to cuts, and respond quickly to soft spots or darkened tissue. With vigilance, your plumeria can stay healthy and bloom beautifully, even after a scare with stem rot.
Turn the explanation into an action plan
- Monitor
- Compare whole-plant photographs monthly during active growth and at each seasonal transition.
- Change one thing
- Make the smallest justified correction, record the date, and avoid stacking treatments before you can see which one helped.
- Escalate when needed
- Inspect roots and major stems promptly when decline is sudden, anchorage fails, or several branches soften or die back.