
The Plumeria How-To Guide offers step-by-step instructions for essential tasks like rooting, pruning, fertilizing, and repotting—helping you grow strong, healthy plumeria with proven techniques.
How to Correct Yellow Leaves in Plumeria
What to check next
This guide helps you connect growth habit, light, roots, water, nutrition, season, and cultivar traits before trying to correct the whole plant. Read the detailed explanation, then use this sequence to decide what to do.
- 1
- 2
Check the foundation
Inspect anchorage, container size, roots, drainage, and the amount and direction of light.
- 3
Compare season and cultivar
Confirm whether the habit is new, worsening, seasonal, or normal for the variety.
- 4
Correct the strongest limiter
Address the clearest root, light, structural, moisture, or nutrition limitation first.
- 5
Measure new growth
Use dated photos, internode length, branching, and the next leaf flush to judge progress.
How microclimate changes this answer
A sheltered wall, partial canopy, wind, container heat, and winter storage can shape the plant more than its regional Zone.
Compare this leaf pattern with healthy growth
Use these references to confirm that this article matches the visible pattern before changing care or applying a treatment.
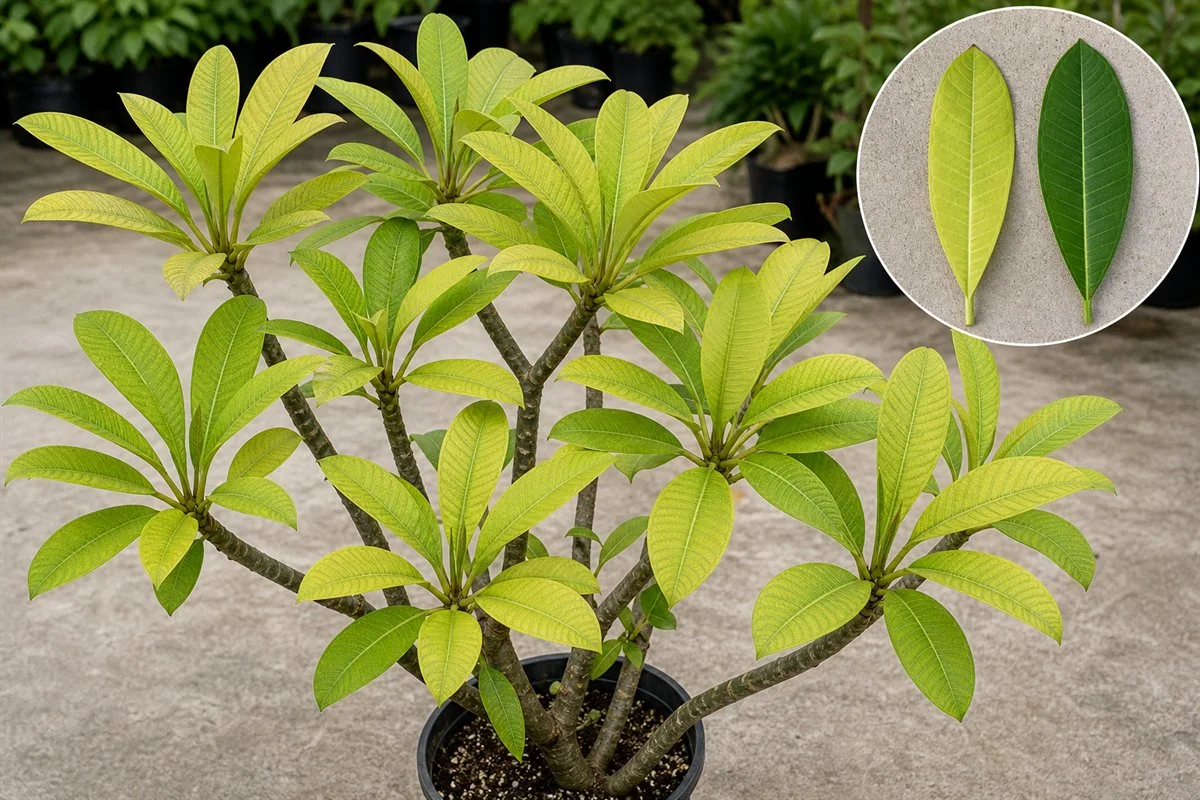 Condition reference
 Healthy baseline
- LocationCheck which plant part, age of growth, and exposed or protected side is affected.
- TextureDecide whether the evidence is dry, powdery, sticky, raised, translucent, soft, or intact.
- ProgressionPhotograph the same area so you can tell whether the pattern is stable, improving, or spreading.
Use more than one clue. Confirm the photo with recent conditions, roots, watering history, and the rest of the plant before acting.
Identifying and Amending Nutrient Deficiencies to Prevent Yellowing of Plumeria Leaves
Yellowing of plumeria leaves may signal a nutrient deficiency that requires immediate attention. By identifying the specific deficiency and taking appropriate measures to amend the soil, you can prevent further yellowing and promote healthy growth. Here’s a comprehensive guide to identify nutrient deficiencies and amend the soil accordingly:
1. Identifying Nutrient Deficiencies
Yellowing leaves in plumerias could be indicative of several nutrient deficiencies. The pattern of yellowing and other symptoms can provide clues:
a) Nitrogen Deficiency
- Symptoms: Older leaves turn pale green to yellow because plants will transport the available nitrogen to the newer leaves.
- Solution: Add a balanced, slow-release fertilizer with a higher nitrogen content or use a nitrogen-rich organic amendment like blood meal or well-rotted manure.
b) Iron Deficiency
- Symptoms: Young leaves exhibit interveinal chlorosis, where the tissue between the veins turns yellow while the veins remain green.
- Solution: Apply iron chelate or iron sulfate to the soil, following the manufacturer’s instructions.
c) Magnesium Deficiency
- Symptoms: Older leaves may show yellowing or reddening of the leaf margins, and the areas between the veins become pale.
- Solution: Apply Epsom salts (magnesium sulfate) as a soil drench or foliar spray.
d) Potassium Deficiency
- Symptoms: Older leaves may show yellowing or browning at the tips and edges, along with black spots on the underside of the leaves.
- Solution: Use a potassium-rich fertilizer or organic amendments like wood ash or kelp meal.
2. Soil Testing
If the deficiency is not clearly identifiable, consider performing a soil test. Many gardening centers offer soil testing services that provide detailed insights into nutrient levels and pH.
3. Amending the Soil
Based on the identified deficiency, amend the soil using appropriate fertilizers or organic materials:
- Choose the Right Amendment: Select a product that targets the specific deficiency. Read labels carefully to ensure it’s suitable for plumerias.
- Follow Application Guidelines: Use the amendment according to the manufacturer’s instructions or general guidelines for organic materials.
- Monitor pH: Some amendments may alter soil pH, so keep an eye on this and adjust as needed.
4. Ongoing Monitoring and Care
- Monitor Plant Response: Observe how the plumeria responds to the treatment and make further adjustments as needed.
- Maintain Proper Watering: Ensure consistent watering as uneven moisture levels can affect nutrient uptake.
- Consider a Balanced Fertilizer: Using a balanced fertilizer specifically formulated for plumerias during the growing season can prevent future deficiencies.
Conclusion
Yellowing of plumeria leaves can be an alarming sign, but it’s often correctable with careful observation and targeted soil amendments. Identifying the specific nutrient deficiency and taking prompt action to amend the soil can restore your plumerias’ vibrant green color and overall health. Regular monitoring and proper care practices will keep your plumerias thriving and free from nutrient-related issues.
Turn the explanation into an action plan
- Monitor
- Compare whole-plant photographs monthly during active growth and at each seasonal transition.
- Change one thing
- Make the smallest justified correction, record the date, and avoid stacking treatments before you can see which one helped.
- Escalate when needed
- Inspect roots and major stems promptly when decline is sudden, anchorage fails, or several branches soften or die back.