
The Plumeria Pests and Diseases Guide is an essential resource for identifying, preventing, and treating the most common threats to plumeria plants, including pests, fungi, and environmental stressors. This guide offers detailed information on how to recognize early signs of trouble, from insect infestations to fungal infections, and provides practical solutions to address these issues. It also covers strategies for managing environmental factors such as excessive humidity, temperature fluctuations, and poor soil conditions, which can weaken plumeria. With expert tips on natural and chemical treatments, as well as proactive care practices, this guide ensures your plumeria remains healthy, resilient, and free from common ailments, allowing it to thrive season after season.
Bacterial Soft Rot on Plumeria: Identification, Treatment and Prevention
What to check next
This guide helps you separate infectious disease from pests, exposure injury, nutrition symptoms, and normal aging before pruning or treating. Read the detailed explanation, then use this sequence to decide what to do.
Confirm the evidence for bacterial soft rot or black-tip decay
- Look for
- Rapid water-soaked collapse, soft tissue, dark advancing margins, foul odor, or watery decay that progresses over days.
- Compare with
- Cold injury, sunburn, dry tip dieback, fungal canker, and bruising may darken tissue without wet foul-smelling collapse.
- Safest first response
- Isolate immediately, keep tissue dry, remove advancing soft decay with sanitized tools when salvageable, and disinfect between every cut.
Microclimate clue: Warm wet conditions, fresh wounds, trapped moisture, and contaminated tools can accelerate bacterial decay.
- 1
Stabilize and isolate
Keep questionable plants away from healthy collections and avoid splashing water or sharing tools.
- 2
Describe the tissue
Note whether damage is dry, powdery, water-soaked, sunken, soft, foul-smelling, or one-sided.
- 3
Map the progression
Photograph and mark the edge so you can tell whether the condition is spreading.
- 4
Confirm the closest match
Compare the defining sign, not only leaf color, and use laboratory testing when needed.
- 5
Intervene narrowly
Remove only unsalvageable tissue, sanitize tools, and treat only when the diagnosis supports it.
How microclimate changes this answer
Long leaf wetness, warm humidity, poor airflow, and cool wet roots increase disease pressure; intense sun and cold create look-alikes.
Compare this disease or rot pattern with healthy growth
Use these references to confirm that this article matches the visible pattern before changing care or applying a treatment.
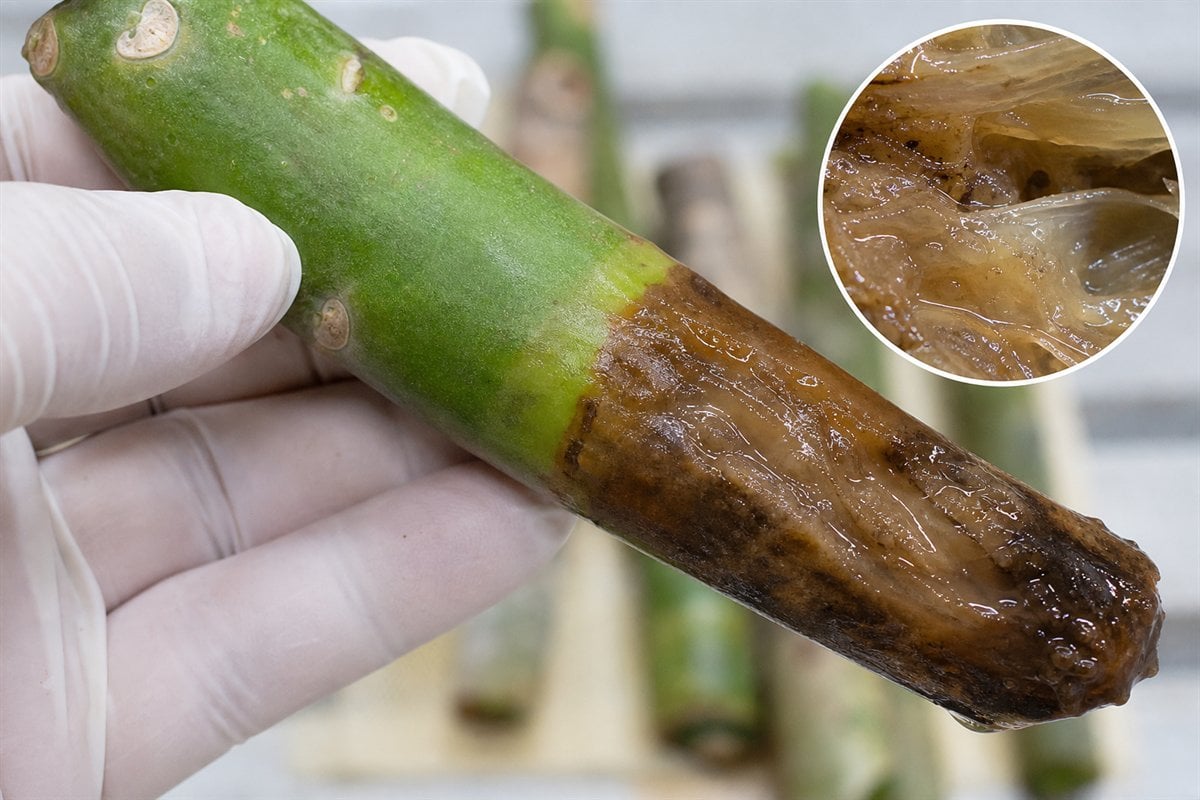 Condition reference
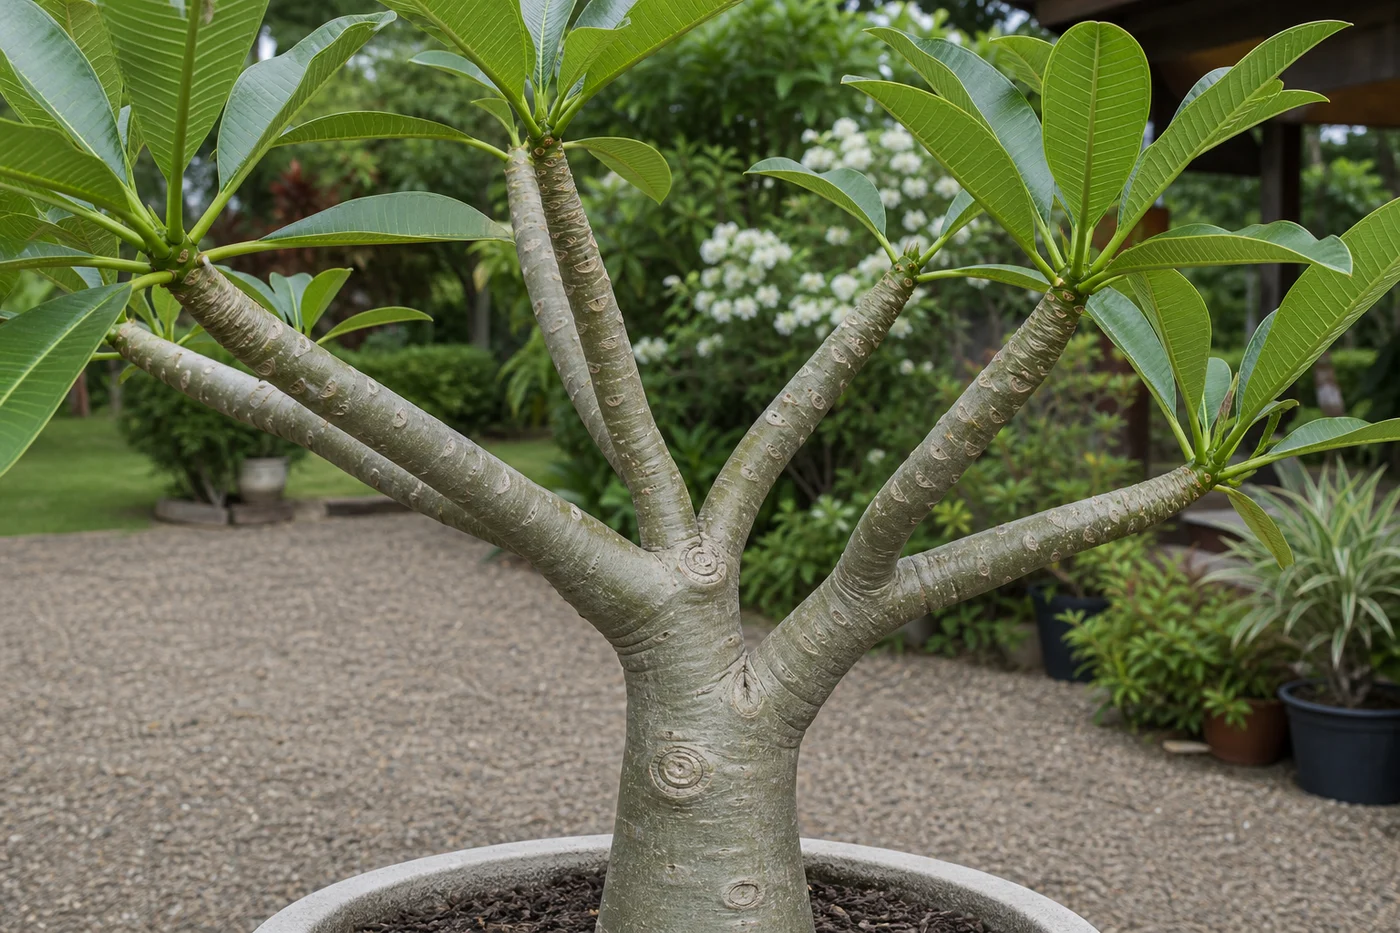 Healthy baseline
- LocationCheck which plant part, age of growth, and exposed or protected side is affected.
- TextureDecide whether the evidence is dry, powdery, sticky, raised, translucent, soft, or intact.
- ProgressionPhotograph the same area so you can tell whether the pattern is stable, improving, or spreading.
Use more than one clue. Confirm the photo with recent conditions, roots, watering history, and the rest of the plant before acting.
Bacterial soft rot is a fast-moving breakdown of plumeria tissue that may become watery, mushy, dark, foul-smelling, or suddenly collapsed. It is more urgent than an old dry scar, surface discoloration, or a firm callus. Products do not restore decomposed tissue, so the first decision is whether clean firm tissue remains that can be saved.
1. Confirm Active Soft Rot
| Evidence | What it suggests |
|---|---|
| Watery, mushy, translucent, collapsing tissue | Strong evidence of active soft breakdown |
| Foul or fermented odor from the affected tissue | Supports bacterial soft rot and increases urgency |
| Softness spreading beyond the visible dark area | Rot has probably advanced farther than surface color shows |
| Firm dry scar, firm callus, or stable corking without odor | More consistent with healed injury or inactive damage; monitor before cutting |
| Blackened tip after cold weather but stem remains firm | Compare with black tip injury and monitor for softening before assuming soft rot |
Use clean gloves, keep the plant away from the collection, and check firmness above and below the visible area. Do not squeeze repeatedly or spread liquid from the lesion to healthy tissue.
2. Isolate, Remove, and Dry
- Isolate immediately: Move the plant away from healthy plumeria and prevent drainage water or contaminated tools from contacting other plants.
- Decide whether it is salvageable: If firm healthy tissue remains beyond the affected area, cut back to uniformly clean, firm tissue. If rot reaches the crown, most of the stem, or the entire seedling, discarding the plant may protect the collection.
- Disinfect between every cut: Clean the blade after each cut and before using it on another plant. Follow the sanitizer label for concentration, contact time, rinsing, and corrosion precautions.
- Keep the cut dry: Let the wound or salvaged cutting dry and callus in a warm, shaded, well-ventilated location. Do not seal wet or questionable tissue.
- Recheck: If softness, discoloration, or odor returns, cut farther only if enough firm tissue remains.
What Products Can and Cannot Do
A labeled copper product may help protect exposed or nearby healthy tissue in some situations, but it does not cure internal soft rot or replace removal of decomposed tissue. Do not pour peroxide, bleach, alcohol, soap, oil, or an unlabeled antibiotic into the plant or root zone. Use conventional products only where their current label specifically permits the plant, disease, site, and application method.
3. Match Aftercare to the Plant Stage
- Salvaged unrooted cutting: Re-cut to clean tissue, allow a full callus, then begin rooting again. Water once at the beginning of rooting and do not water again until two or three full-sized leaves have grown. Mist the stem only if a firm cutting looks dehydrated.
- Newly rooted cutting: Preserve sound roots when possible, water sparingly, and let the mix approach dry before watering again.
- Seedling: Remove a collapsed seedling and contaminated nearby debris. Keep remaining media lightly and evenly moist, never saturated, and improve gentle airflow.
- Established plant: Correct drainage, avoid wet wounds, and postpone fertilizer until active rot has stopped and recovery is visible.
4. Prevent New Infections
- Use clean cutting tools, clean containers, and clean work surfaces.
- Protect fresh cuts from rain, splashing water, and contaminated hands or tools.
- Provide drainage and airflow appropriate to the plant stage and current weather.
- Do not root damaged or poorly callused cuttings in cold, wet media.
- Quarantine plants with unexplained soft tissue or odor until the condition is stable.
Watering Safeguard by Plant Stage
| Plant stage | Watering rule |
|---|---|
| Salvaged unrooted cutting | Remove all soft, watery, or foul-smelling tissue, disinfect tools between cuts, and allow the cut surface to fully callus. Water once at the beginning of the rooting process, then do not water again until two to three full-sized leaves have grown. Mist the stem only if the firm cutting looks dehydrated. |
| Newly rooted cutting | Water sparingly and allow the mix to approach dry before watering again. New roots and recently healed tissue are easily damaged by continually wet media. |
| Established plant | Match watering to root-zone moisture, drainage, weather, season, and active growth. Keep water away from open wounds and do not allow water to stand around the roots. |
| Seedling | Keep the small root zone lightly and evenly moist, never saturated. Isolate and remove seedlings with rapidly spreading soft decay. |
Turn the explanation into an action plan
- Monitor
- Mark lesion borders and photograph the plant every two to three days during rapid change, or weekly when stable.
- Change one thing
- Make the smallest justified correction, record the date, and avoid stacking treatments before you can see which one helped.
- Escalate when needed
- Act quickly when soft decay moves into the trunk, foul odor appears, blackening advances daily, or several plants show the pattern.