
Growing plumeria from seed is a rewarding way to cultivate new and unique varieties of this tropical flower, and this guide shows you how. You’ll learn how to identify and harvest plumeria seedpods, extract and successfully germinate plumeria seeds, and nurture plumeria seedlings into thriving plants. Whether you’re new to plumeria cultivation or an experienced enthusiast, our step-by-step guide offers clear, expert advice at every stage of this journey, helping you grow healthy, vibrant plumeria plants from seed with confidence.
Damping off disease is a fungus
What to check next
This guide helps you match the plant to its germination stage and separate normal coat shedding and cotyledon changes from moisture, light, root, pest, and damping-off problems. Read the detailed explanation, then use this sequence to decide what to do.
- 1
Identify the exact stage
Use unsprouted seed, emerging root, coat shedding, cotyledons, true leaves, or transplant stage.
- 2
Inspect the media line
Look for a pinched, dark, translucent, or collapsing stem and note whether media stays wet.
- 3
Balance light, warmth, and moisture
Provide bright light, gentle airflow, stable warmth, and evenly moist rather than saturated media.
- 4
Handle only when necessary
Do not pull a coat from living tissue; soften and assist only when it is truly stuck.
- 5
Track daily progress
Compare height, stem strength, leaf opening, and media condition each day.
How microclimate changes this answer
A warm room can still have a cold wet windowsill. Domes, trays, grow lights, airflow, and pot depth create their own microclimate.
Compare this seedling pattern with healthy growth
Use these references to confirm that this article matches the visible pattern before changing care or applying a treatment.
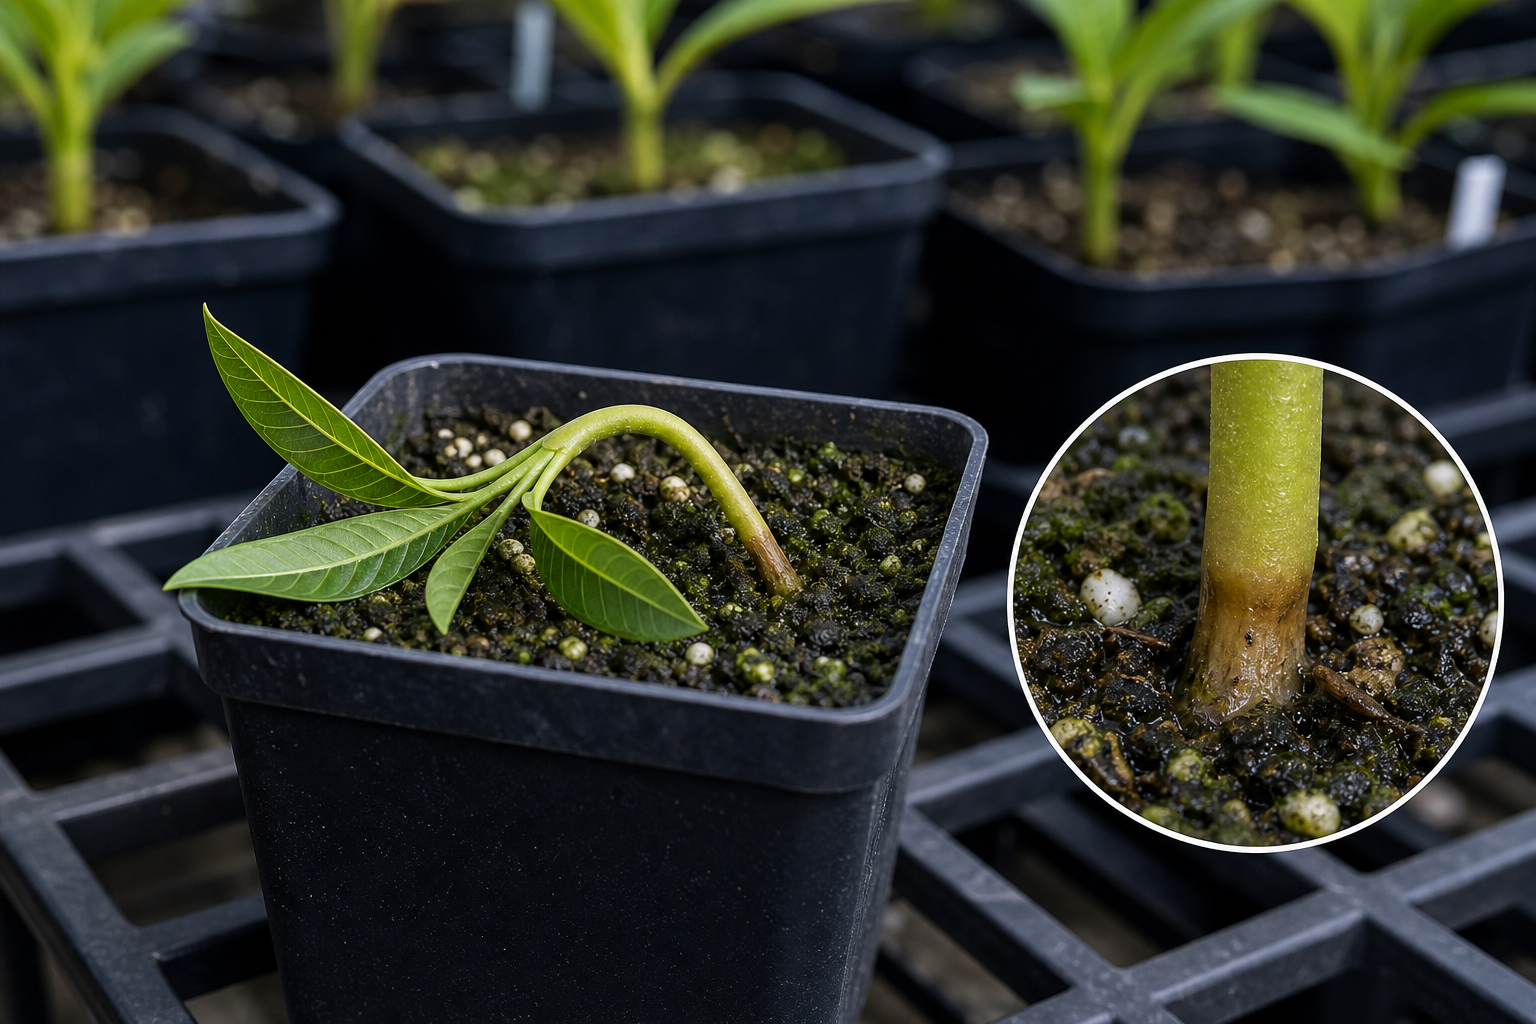 Condition reference
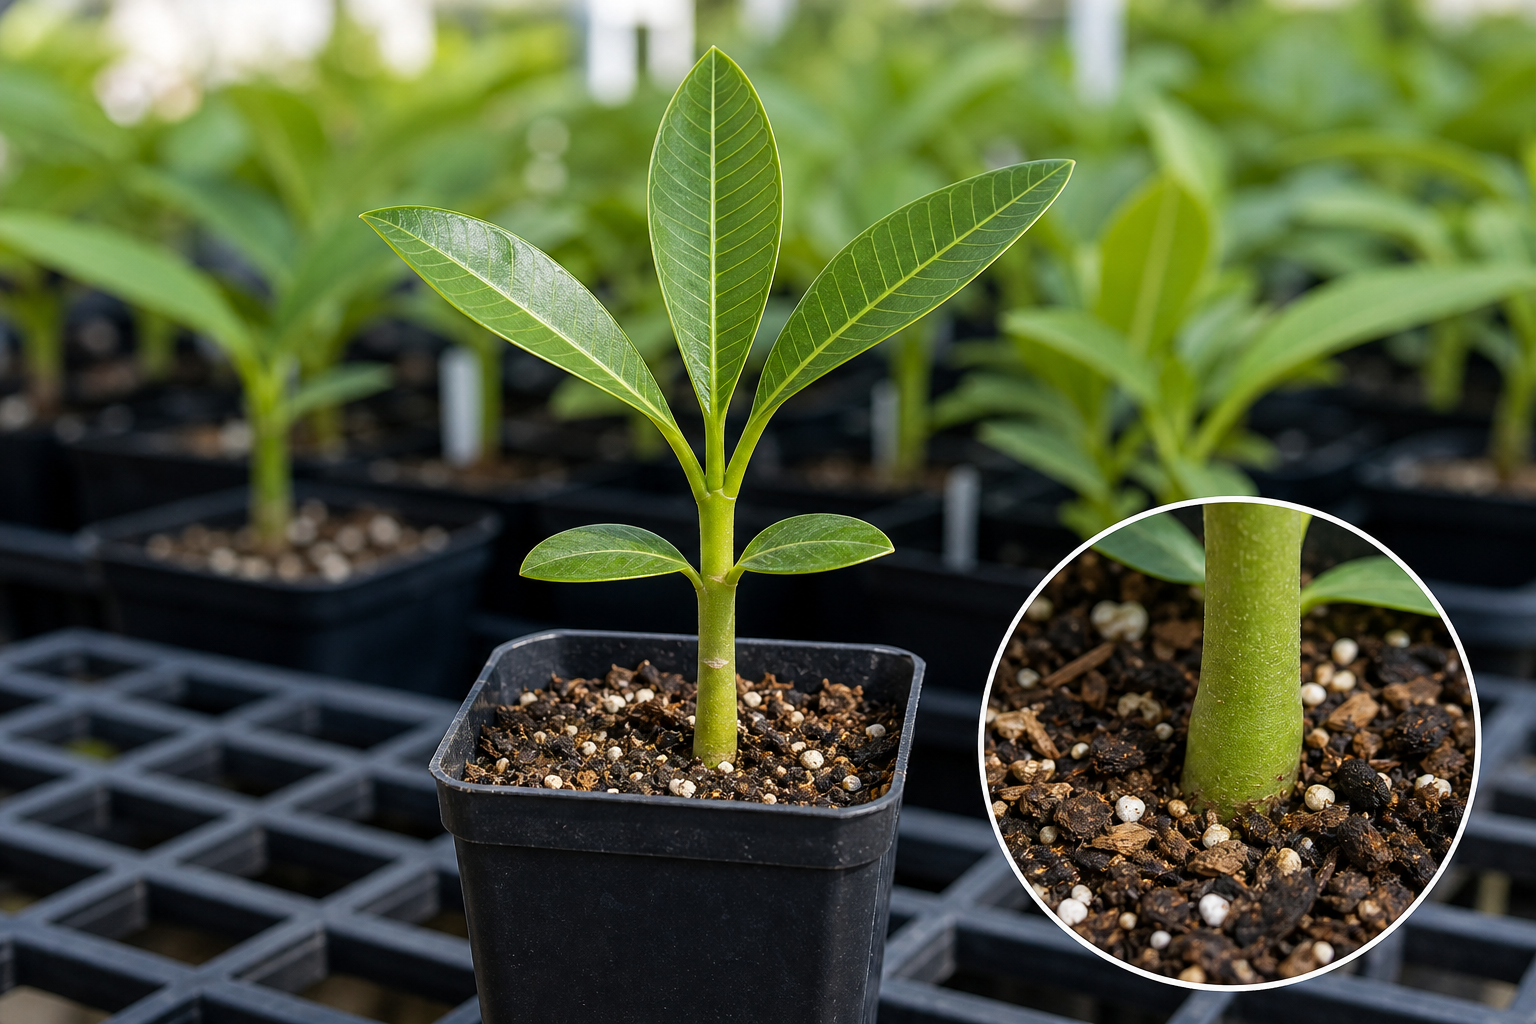 Healthy baseline
- LocationCheck which plant part, age of growth, and exposed or protected side is affected.
- TextureDecide whether the evidence is dry, powdery, sticky, raised, translucent, soft, or intact.
- ProgressionPhotograph the same area so you can tell whether the pattern is stable, improving, or spreading.
Use more than one clue. Confirm the photo with recent conditions, roots, watering history, and the rest of the plant before acting.
Damping off disease is a fungus that affects seedling plants of many crops. Could it be due to seedlings experiencing some stress, possibly due to a combination of factors, including watering habits and light exposure? Here’s a step-by-step approach to help save your seedlings and prevent further issues:
1. Assess the Situation
- Check the Roots: Carefully inspect the roots of the affected seedlings. If they are brown and mushy, it could be root rot, which is often caused by overwatering or poor drainage. If the roots are dry and brittle, the plant may be underwatered.
- Examine the Leaves: Look for signs of distress in the leaves, such as wilting, yellowing, or browning. This can provide clues about the health of the plant and its growing conditions.
2. Adjust Watering Practices
- Moisture Balance: Ensure the soil is consistently moist but not waterlogged. Plumeria seedlings need a delicate balance — the soil should feel like a wrung-out sponge. If it’s drying out too quickly, consider more frequent, lighter watering to keep the soil evenly moist.
- Watering Technique: Water directly at the base of the seedlings to avoid wetting the foliage, which can lead to fungal diseases. Use room temperature water to avoid shocking the tender roots.
3. Optimize Light Exposure
- Partly Sunny Spot: Plumeria seedlings require bright, indirect light. Direct sunlight can be too intense and may scorch young seedlings, while insufficient light can weaken them. If the seedlings were moved to a partly sunny spot and showed signs of distress, adjust their position to ensure they receive indirect light that is bright but not harsh.
- Gradual Acclimatization: If moving seedlings to a new lighting condition, do so gradually. Sudden changes in light exposure can stress plants, making them more susceptible to issues.
4. Check Soil and Drainage
- Soil Type: Use a well-draining potting mix designed for succulents or cacti, which can also be ideal for plumeria. This helps prevent water retention around the roots, reducing the risk of root rot.
- Drainage: Ensure that the containers have adequate drainage holes. If pots are sitting in trays, empty the excess water from the trays after watering to avoid soggy conditions.
5. Consider Fungal Diseases
- Fungicide Application: If you suspect fungal issues, consider applying a fungicide. Choose a safe product for young plants and follow the application instructions carefully.
6. General Plant Care
- Nutrition: Seedlings generally do not require fertilizer until they have established a strong root system and several sets of true leaves. When you do start to fertilize, use a diluted, balanced fertilizer to avoid burning the young roots.
7. Monitor and Adjust
- Regular Checks: Continue to monitor your seedlings regularly, paying close attention to their response to the adjustments in watering, lighting, and care. Make further tweaks as needed based on their progress.
By carefully adjusting these aspects of care, you can help stabilize your plumeria seedlings and promote healthier growth. Consistency is key, and gradual changes are always best to avoid further shocking the plants.
Turn the explanation into an action plan
- Monitor
- Check germinating seeds and very young seedlings daily; photograph the same plant beside a size reference.
- Change one thing
- Make the smallest justified correction, record the date, and avoid stacking treatments before you can see which one helped.
- Escalate when needed
- Separate affected seedlings when the stem pinches or collapses, mold spreads, or several seedlings decline in one tray.