
The Propagation and Rooting Guide provides detailed, step-by-step instructions for successfully propagating plumeria through various methods, including cuttings, grafting, and seed starting. This comprehensive guide walks you through each technique, offering proven strategies to encourage healthy root development and ensure strong, thriving plants. Whether you’re starting with a cutting, grafting to preserve a cultivar, or growing from seed, you’ll learn how to create the ideal conditions for success. With expert advice on soil types, humidity levels, and care routines, this guide helps you master the art of plumeria propagation, ensuring your plants grow strong from the very beginning.
Light & Temperature Management Post Propagation for Plumeria
What to check next
This guide helps you match the cutting to its rooting stage and distinguish normal waiting from dehydration, false shoot growth, mold, rot, and roots. Read the detailed explanation, then use this sequence to decide what to do.
- 1
Confirm the stage
Separate fresh-cut, callusing, newly planted, unrooted shoot growth, and confirmed rooting.
- 2
- 3
Water once at the beginning
After planting a fully callused cutting, water once at the beginning of rooting and add no more water to the mix until two or three fully expanded leaves have grown.
- 4
Avoid constant disturbance
Do not pull the cutting to search for roots; use stability and sustained leaf growth.
- 5
How microclimate changes this answer
Cool nights and wet media slow rooting and increase rot risk. Hot sun and dry wind can dehydrate an unrooted cutting; light stem misting is allowed when a firm cutting looks dehydrated, but keep water off the base and mix.
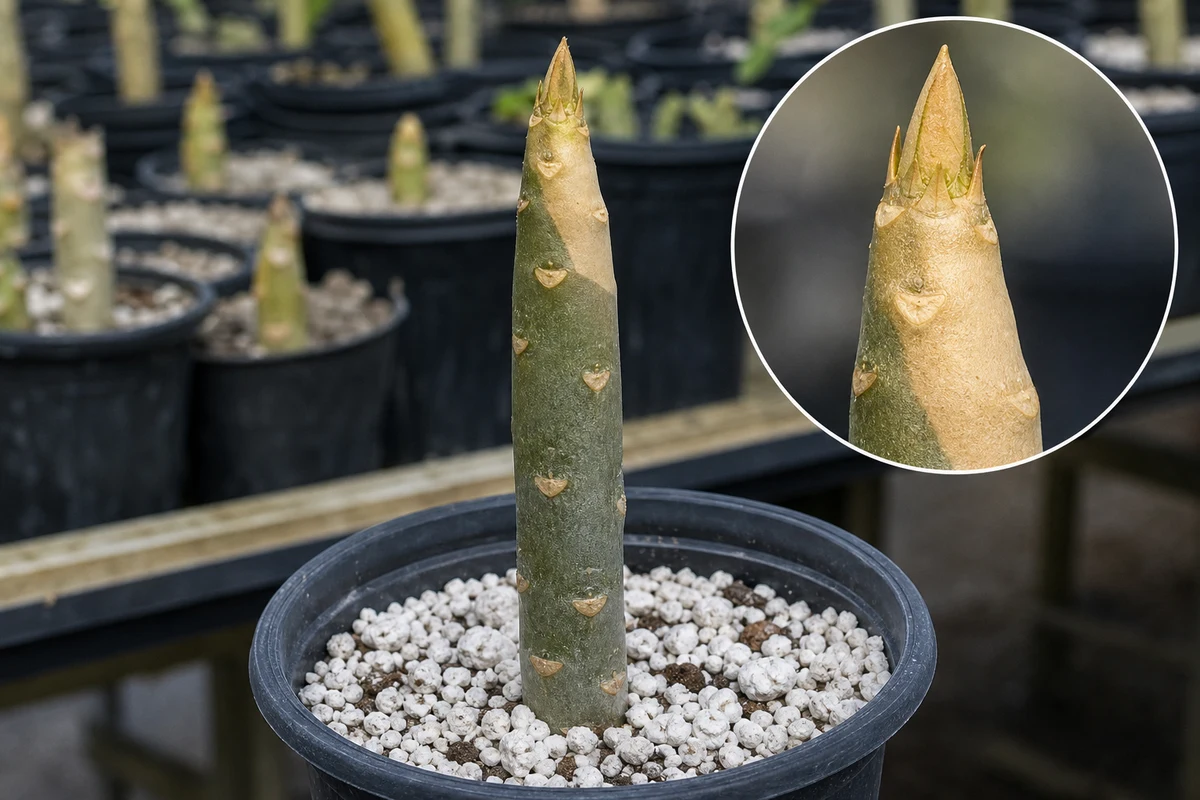
When exposure injury is likely: Look for a dry, sharply bounded bleached, tan, or dark patch on the exposed side of a firm cutting. Soft, spreading, wet, or foul-smelling tissue points more strongly to rot.
Immediate response: Move the cutting to bright, protected light with stable warmth. Check the rooting medium before changing anything. Do not water simply because the exposed tip looks damaged.
Recovery: Keep the cutting protected while firm tissue and healthy new growth develop. Resume normal watering only after roots are established and two or three full-sized leaves are present.
Rooting-cutting water rule: Water once at the beginning of the rooting process. Do not water again until the cutting has produced two or three full-sized leaves. If the firm cutting looks dehydrated, light misting is allowed; do not use misting to keep the rooting medium wet.
After roots are confirmed: Water newly rooted cuttings sparingly and allow the soil mix to dry before watering again.
Light & Temperature Management Post Propagation for Plumeria
Proper control of light exposure and temperature conditions is crucial for newly propagated plumeria, whether from cuttings, grafts, or air layers. The right environment minimizes stress, promotes root and shoot development, and accelerates acclimation. This guide provides comprehensive recommendations, structured steps, and troubleshooting tips.
1. Importance of Light and Temperature
- Photosynthesis Activation: Adequate light drives energy production for root and shoot growth.
- Hormonal Balance: Temperature cues regulate auxin and cytokinin levels, influencing root initiation and scion healing.
- Stress Mitigation: Avoidance of light or heat extremes reduces transplant shock and tissue damage.
2. Light Requirements
2.1. Intensity and Duration
- Indirect Bright Light: Provide 1,000–2,000 foot-candles (e.g., shaded morning sun or bright filtered light) for the first 2–4 weeks.
- Photoperiod: Maintain 12–14 hours of light per day to support moderate growth without overstressing new roots.
2.2. Gradual Acclimation to Full Sun
- Weeks 1–2: 50% shade cloth or indirect light only.
- Weeks 3–4: Reduce shading to 25%; introduce morning sun for 1–2 hours.
- Weeks 5–6: Remove shading completely, ensuring plants receive gentle morning and late afternoon sun.
2.3. Artificial Lighting (Indoor Propagation)
- LED Grow Lights: Full-spectrum LEDs at 12–18 inches above plants.
- Intensity: 150–300 µmol/m²/s PPFD for 12–14 hours daily.
- Adjustments: Raise lights as shoots elongate to maintain proper intensity.
3. Temperature Guidelines
3.1. Ideal Ranges
- Daytime: 75–85°F (24–29°C) to promote metabolic activity.
- Nighttime: 65–70°F (18–21°C) to allow restful respiration without cold stress.
3.2. Avoiding Temperature Extremes
- Heat Stress: Temperatures above 95°F (35°C) can cause leaf wilting and hinder root development.
- Cold Damage: Temperatures below 60°F (16°C) slow rooting and may damage tender tissues.
3.3. Seasonal Adjustments
- Hot Summers: Provide afternoon shade, increase ventilation, use evaporative cooling or mist systems.
- Cool Growth Seasons: Utilize greenhouses, heat mats at the base of cuttings, or bottom heat to maintain optimal root-zone temperatures.
4. Structured How-To: Implementing Light & Temperature Control
- Setup Propagation Area: Position under filtered light or install shade cloth.
- Measure Conditions: Use a light meter and thermometer/hygrometer to monitor daily.
- Adjust Shade & Heat: Apply shade cloth or shading paint; install heat mats or fans as needed.
- Acclimation Schedule: Follow the gradual light introduction plan (Section 2.2).
- Ongoing Monitoring: Record daily readings; adjust lighting height, shading, or heating to maintain set ranges.
5. Troubleshooting Common Issues
| Issue | Possible Cause | Solution |
|---|---|---|
| Leaf Bleaching or Scorching | Excessive direct sun or high heat | Increase shading; move to indirect light; reduce temp. |
| Leggy, Weak Growth | Insufficient light intensity/duration | Increase light hours or intensity; adjust light spectrum. |
| Slow Root Development | Temperatures too low | Add bottom heat; raise the ambient temperature in the greenhouse. |
| Wilting Despite Moisture | High temperatures, low humidity | Add bottom heat; raise the ambient temp with the greenhouse. |
6. Timeline & Milestones
| Stage | Weeks After Propagation | Light & Temp Protocol |
| Initial Phase | 1–2 | Indirect light, 75–85°F day / 65–70°F night |
| Acclimation Phase | 3–4 | Gradual shade removal, maintain ideal temps |
| Full Exposure Phase | 5+ | Full light exposure, consistent temp management |
Turn the explanation into an action plan
- Monitor
- Record the planting date, one initial watering date, firmness, stability, and the first two or three fully expanded leaves without moving the base.
- Change one thing
- Make the smallest justified correction, record the date, and avoid stacking treatments before you can see which one helped.
- Escalate when needed
- Unpot only when the base softens, odor develops, collapse advances, or the cutting is clearly failing rather than simply slow.