
The Plumeria Pests and Diseases Guide is an essential resource for identifying, preventing, and treating the most common threats to plumeria plants, including pests, fungi, and environmental stressors. This guide offers detailed information on how to recognize early signs of trouble, from insect infestations to fungal infections, and provides practical solutions to address these issues. It also covers strategies for managing environmental factors such as excessive humidity, temperature fluctuations, and poor soil conditions, which can weaken plumeria. With expert tips on natural and chemical treatments, as well as proactive care practices, this guide ensures your plumeria remains healthy, resilient, and free from common ailments, allowing it to thrive season after season.
Leaf Node Rot on Plumeria: Identification, Treatment and Prevention
What to check next
This guide helps you separate infectious disease from pests, exposure injury, nutrition symptoms, and normal aging before pruning or treating. Read the detailed explanation, then use this sequence to decide what to do.
Confirm the evidence for prevention and integrated management
- Look for
- Current pest pressure, plant stress, nearby sources, sanitation gaps, and fresh damage rather than old cosmetic injury alone.
- Compare with
- A few beneficial or incidental insects do not justify broad treatment, and old damage does not prove that a pest remains active.
- Safest first response
- Quarantine arrivals, inspect on a schedule, correct plant stress, remove sources, preserve beneficial organisms, and escalate only when thresholds are met.
Microclimate clue: Inspection frequency should rise during the heat, humidity, rain, or protected-storage conditions that favor the likely problem.
- 1
Stabilize and isolate
Keep questionable plants away from healthy collections and avoid splashing water or sharing tools.
- 2
Describe the tissue
Note whether damage is dry, powdery, water-soaked, sunken, soft, foul-smelling, or one-sided.
- 3
Map the progression
Photograph and mark the edge so you can tell whether the condition is spreading.
- 4
Confirm the closest match
Compare the defining sign, not only leaf color, and use laboratory testing when needed.
- 5
Intervene narrowly
Remove only unsalvageable tissue, sanitize tools, and treat only when the diagnosis supports it.
How microclimate changes this answer
Long leaf wetness, warm humidity, poor airflow, and cool wet roots increase disease pressure; intense sun and cold create look-alikes.
Compare this disease or rot pattern with healthy growth
Use these references to confirm that this article matches the visible pattern before changing care or applying a treatment.
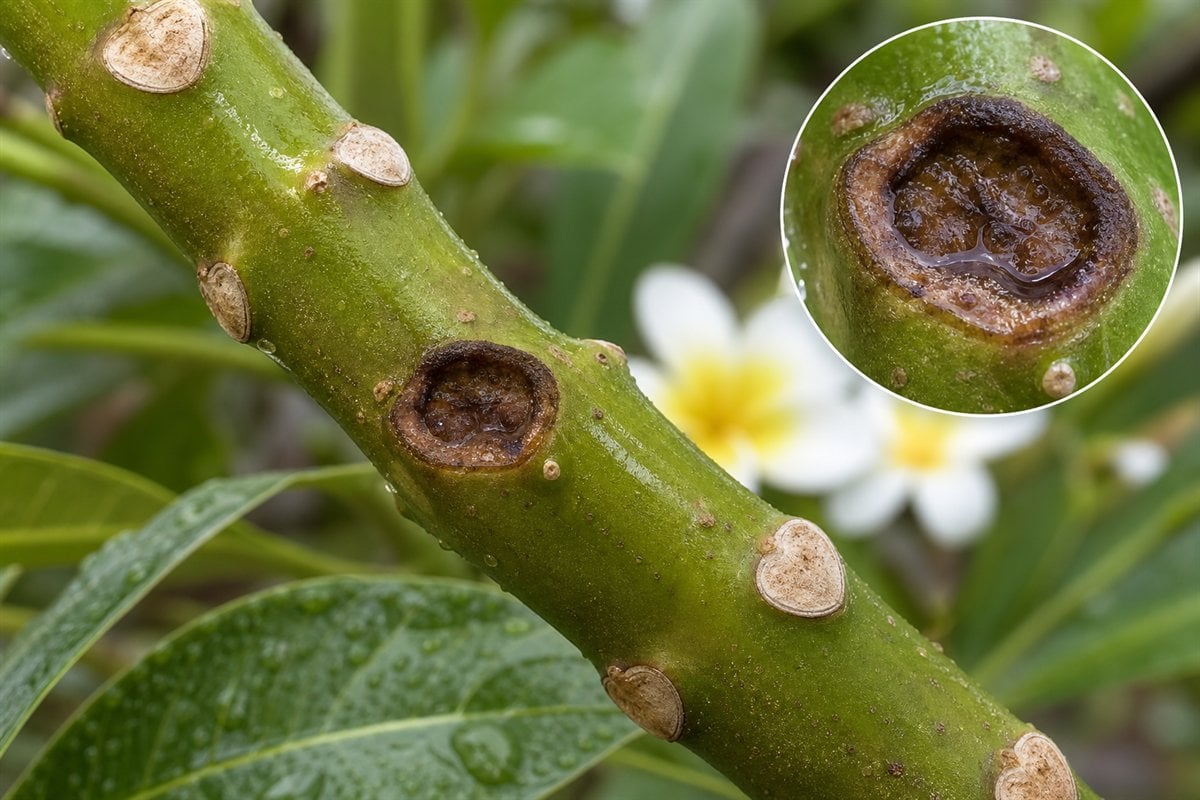 Condition reference
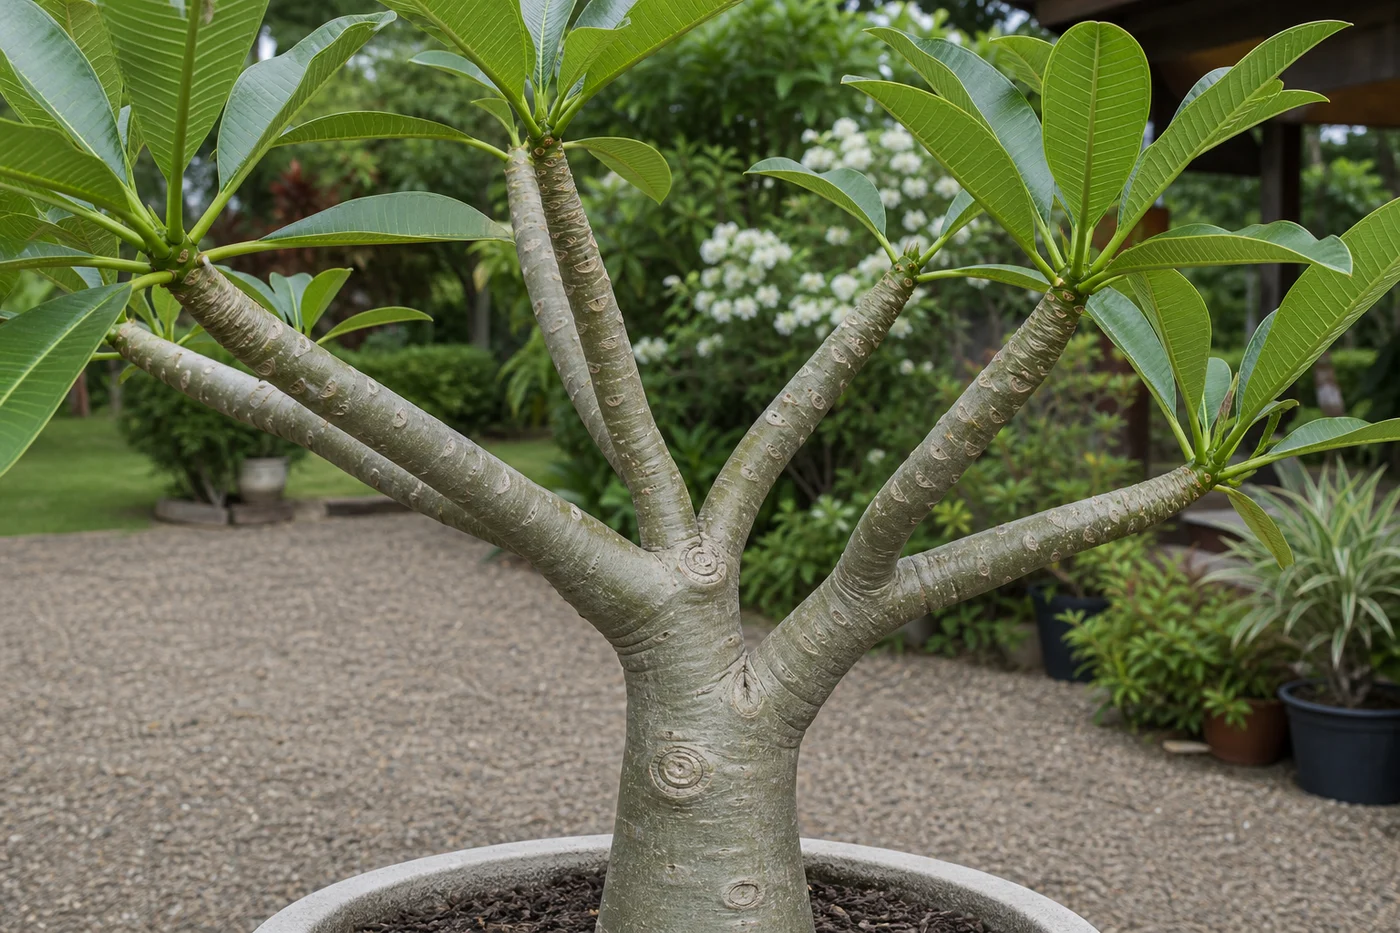 Healthy baseline
- LocationCheck which plant part, age of growth, and exposed or protected side is affected.
- TextureDecide whether the evidence is dry, powdery, sticky, raised, translucent, soft, or intact.
- ProgressionPhotograph the same area so you can tell whether the pattern is stable, improving, or spreading.
Use more than one clue. Confirm the photo with recent conditions, roots, watering history, and the rest of the plant before acting.
Leaf node rot is a localized decay pattern centered on the place where a leaf petiole joins or separated from the stem. It may follow tearing, premature leaf removal, cool wet weather, prolonged surface moisture, cold injury, or contamination, but the visible pattern does not prove one fungus or bacterium.
Decide whether the leaf scar is dry or actively decaying
Normal plumeria leaf scars become dry, firm, and sealed. Concern increases when a scar remains wet, turns sunken or soft, develops odor, or expands into surrounding stem. Photograph the exact boundary and recheck it rather than treating brown color alone.
Fast decision table
| What you find | What it suggests | Next step |
|---|---|---|
| Dry, firm, flat scar with no expansion | Normal healing or old stable injury. | Keep dry and monitor; do not cut healthy stem. |
| Wet or sunken scar after rain or leaf removal | Early localized decay risk. | Shelter from water, improve drying, photograph, and recheck within 24 hours. |
| Soft, odorous, hollow, or expanding tissue | Active decay is likely. | Isolate and remove all affected tissue to firm clean stem with sanitized tools. |
| Long crack or sunken lesion not centered on a node | Stem canker or wound injury may fit better. | Use the Stem Canker guide. |
| Entire section becomes soft beyond the node | Broader stem or bacterial soft rot is possible. | Use the Stem Rot guide and act promptly. |
| Terminal tip darkens while lower nodes stay firm | Black tip or cold injury may be more specific. | Use the Black Tip Rot guide. |
Step-by-step response
- Record the node: photograph the whole branch and close-up; note recent rain, overhead water, cold, leaf fall, manual leaf removal, pruning, sprays, and handling.
- Check location: confirm the lesion is centered on a leaf scar rather than a random mid-stem wound, tip, or soil line.
- Compare firmness gently: test the scar edge and nearby healthy stem without repeated squeezing or puncturing.
- Dry a stable lesion: protect it from rain and irrigation, improve airflow, and do not seal wet tissue.
- Mark and recheck: compare the boundary, depth, odor, and softness after 24 and 48 hours.
- Remove active decay: when the lesion spreads or softens, cut below all discolored or soft tissue into uniformly firm clean stem. Disinfect tools between cuts and plants.
- Escalate uncertain cases: seek Extension or laboratory support for rapid spread, repeated node loss, valuable plants, or unclear bacterial versus fungal involvement.
Treatment choices
| Choice | When it fits | Limit |
|---|---|---|
| Keep dry and monitor | Scar is firm, localized, and stable. | Recheck after every cool or wet event. |
| Sanitary tissue removal | Lesion is soft, wet, odorous, deep, or advancing. | Partial scraping can leave decay and create a larger wound. |
| Environmental correction | Repeated wetting, crowding, condensation, or cool storage contributes. | Correct conditions without suddenly scorching or dehydrating the plant. |
| Labeled disease product | A supported diagnosis and current ornamental label fit the target and site. | Products cannot restore rotten tissue and should not be chosen from color alone. |
| Diagnostic testing | Fast spread, repeated loss, or high-value plants. | Collect fresh representative tissue before repeated sprays alter evidence. |
Prevention and leaf removal
- Allow leaves to fall naturally whenever practical; do not strip leaves from semi-succulent shoots.
- If removal is necessary, cut the petiole rather than tearing the leaf from the stem, and choose conditions that allow the scar to dry and cover before cool wet weather.
- Avoid overhead irrigation, rain splash, and greenhouse condensation on fresh scars.
- Sanitize cutting tools and hands between plants; avoid handling wet plants.
- Protect retained leaves and stems from cold injury, which can create additional entry wounds.
- Inspect scars after storms, leaf removal, moving, pruning, and winter storage.
Follow-up schedule
- Today: photograph, mark, shelter from water, and isolate if tissue is soft.
- In 24 hours: compare wetness, odor, firmness, and lesion boundary.
- At 48 to 72 hours: continue monitoring a dry stable scar or remove advancing decay.
- Weekly: inspect nearby nodes and confirm the stem below remains firm.
- Before cool wet weather: correct leaf-removal timing, storage airflow, and overhead moisture.
Microclimate: cool pockets, rain exposure, shaded stems, greenhouse condensation, and still storage air can slow scar drying. Use the saved Growing Area and current weather, but let firmness and progression control the action.
Continue with the focused guides
Reference basis: Hodel and colleagues’ plumeria leaf-removal and shoot-decay study, UC IPM sanitation and bacterial disease guidance, and the EPA introduction to pesticide labels.
Watering Safeguard by Plant Stage
| Plant stage | Watering rule |
|---|---|
| Unrooted cutting | Keep damaged leaf scars and fresh cuts dry. Water the rooting medium once at the beginning of the rooting process, then do not water again until two to three full-sized leaves have grown. Mist the stem only if the firm cutting looks dehydrated. |
| Newly rooted cutting | Water sparingly and allow the mix to approach dry before watering again. Keep water from collecting in leaf scars or around tender new growth. |
| Established plant | Match watering to root-zone moisture, drainage, weather, season, and active growth. Avoid repeated overhead watering when leaf scars cannot dry promptly. |
| Seedling | Keep the small root zone lightly and evenly moist, never saturated. Provide airflow and keep water from remaining on tender stems and leaf bases. |
Leaf Node Rot: Choose the Right Response
Leaf node rot begins around a leaf scar or node where moisture and damaged tissue remain. A normal leaf scar may darken as it dries, so look for wetness, softness, expansion, or odor before treating.
1. Identify the change
Compare a dry, firm scar with a wet, sunken, soft, or expanding lesion.
2. Use the least invasive response
Dry and monitor a stable surface spot. Escalate only when tissue remains wet, softens, or spreads into the stem.
3. Prevent recurrence
Reduce prolonged leaf-scar wetness, improve airflow, and inspect after leaf drop, storms, cold, or handling damage.
Escalate promptly when
The soft area enlarges beyond the node, the stem becomes dark or hollow, liquid seeps from the scar, a foul odor appears, or several nodes decline rapidly. Those signs may indicate stem rot or bacterial soft rot rather than a limited surface problem.
Product guidance: A labeled copper or other surface protectant may help reduce spread in an appropriate situation, but it cannot restore rotted internal tissue. Confirm the problem first and follow the label.
Turn the explanation into an action plan
- Monitor
- Mark lesion borders and photograph the plant every two to three days during rapid change, or weekly when stable.
- Change one thing
- Make the smallest justified correction, record the date, and avoid stacking treatments before you can see which one helped.
- Escalate when needed
- Act quickly when soft decay moves into the trunk, foul odor appears, blackening advances daily, or several plants show the pattern.